
Updates changelog-
Safety Considerations section added
Note on hammer control under First Projects section added
Some additional Final Thoughts
Added info and link to Forge Welding
Added additional photos for your viewing pleasure
The Road to Becoming a Smith
One of the most common questions I receive is
asking how to get started in blacksmithing or bladesmithing, and for those I know
personally, how I began my own journey in the craft. The answer to these is
closely related, and in my journey offer a perspective that will hopefully be
able to satisfy the answer to the former.
Primarily, having that interest to begin
learning is the most important piece. Tools and equipment, although able to
help expedite processes, ultimately do not serve as a substitute for skill. If you can do something well with minimal tools, you will also be able to do it with more expensive or specialised equipment. In this post, I will discuss my perspective on the bare minimum needed to get involved with forging steel, what can be expected, where your journey can take you in terms of the tools you can and should be able to make, and general advice.
Where to Work?
First and foremost, you'll need a place to do the work. Hot work can be tricky in finding a suitable location, especially in the heart of large cities. I've worked in shops all across the country in all manner of situations, and so far the only places I have not been able to do any sort of significant hot work is in apartments (for hopefully obvious restrictions). Yards, garages, driveways, barns, dedicated shops, and community maker spaces or guilds can all get the job done. If you know someone in the area who is willing to have you come by and watch or lend a hand doing simple things until you build up an understanding is one of the best ways not only to learn, but to see how certain equipment is and can be used. No matter how much study is done, nothing can fully replicate that tangible experience. Honestly, that is one of the best things I can possibly recommend. Make contacts, branch out, meet people, learn as much as you can in as many different environments as possible.
 |
| Working in the shop at Old Town State Park, CA |
Safety Considerations
This is something important that can greatly impact people's pursuit and enjoyment in the craft. While I am not here to point out every safety concern when working with hot metal and potentially dangerous tools, I would like to address a few things that might not be immediately obvious.
First, burning propane produces carbon monoxide. A lot of it. Using a forge in a place without sufficient ventilation can be a quick path down which there is no return. In one of my first shops, I did my hot work in a welding room. At the time, I thought there was sufficient airflow between the three fan driven fume hoods, positive ventilation from the normal air supply, and an additional fan in the door blowing in. Wrong. I began to notice myself becoming light headed, drowsy, and generally inattentive or slow of thought. Classic signs of carbon monoxide poisoning. Forges burn a lot of propane, whose exhaust includes carbon monoxide and produce it in greater quantities (twice as much CO as C3H8, and four times as much CO2). The risk of carbon monoxide is that it more readily bonds to the haemoglobins in your blood than does diatomic oxygen (the stuff you need). As a result, not only are you delivering less oxygen to your body, but you you are also operating at a limited capacity. The other part of the danger lies in that same unfortunate bonding. Because CO is better held to the iron of the haemoglobins, it is harder to release. In normal respiration, the oxygen is exchanged for CO2, which is then exhaled in the lungs. CO does not do that as easily. Because of this, you can carry around carbon monoxide for a good long while and there is nothing you can do about it. From what I hear (and I am not a medical professional) the only way to expedite the removal of CO from your blood is by breathing pure oxygen for an extended period of time, which is also dangerous. Long story short, make sure you have good ventilation, then get some more. Outside or in large areas are preferred, but when in doubt, air it out!
Next up is a form of tendentious that comes from hammering with improper technique. Unlike hammering in nails, forging requires you to hold a hammer a slightly different way. Instead of having your thumb parallel to and resting on the shaft of the hammer, curl it around like the rest of your fingers. A combination of weight, repetition, and position of the things you are hammering all lead into the equation, and forging is the perfect storm for long term ligament damage if you have your thumb along the hammer's haft. It is tempting, especially when your grip becomes fatigued, but try and resist that urge! Similarly, although not for long term health reasons, hold the hammer loosely as though you are shaking someone's hand. The harder you grip it, the more quickly you will tire. One of the primary causes for early lack of endurance was the belief that I had to death grip the hammer. Because you don't. Obviously you need to maintain control and direction over the hammer, but the more relaxed the grip the better off you will be.
Finally, (and this does not mean these are the only ways to get hurt... these are just ones that might not be inherently understood) wear safety glasses! Especially while grinding! For the traditional reasons of not getting things in your eyes, but also for one very important part of the process. Grinding steel creates thousands upon thousands of high speed metal slivers as abrasive grit attacks steel (and non ferrous stuff too, but steel is the worst for a few reasons). Those slivers have a particularly nasty habit of embedding themselves in the soft tissues of your eyes. When that happens, time does NOT fix the problem. It makes it much worse. Because your tear ducts cannot wash away the slivers, they remain in place, and because steel rusts, it rusts inside your eyes. Not something I have any desire to experience. I personally know several people who this has happened to, and in each situation the people were wearing safety glasses. Those high speed sparks (those same slivers, but burning as they fly through the air) like to bounce around. It happens more often than you would care to realise that they deflect off your face and into your eyes. There are many good solutions to this, ranging from full contact laboratory goggles to controlled environment face masks. At the very least, use normal safety glasses when grinding stuff (and respirators when grinding wood or bone or plastic or metal or anything really).
The intent of laying out these things is not to scare you away, but make you aware of what can happen when doing things 'safe enough' but not actually 'safe'.
Basic Tools
Most of those who ask about getting started are either younger or have a strict budget with which to get their feet wet. For that reason, it can be difficult to justify spending hundreds of dollars on equipment that, if it turns out forging is not for them, can be extremely difficult to recuperate. For that reason, I'll go over some basic tools and alternatives to purpose made equipment that will provide a serviceable entry level setup until a more informed decision can be made of where and how far to delve into the craft.
-Hammers-
Hammers are one of the big three things you need. Without hammers, forging is not going to happen. Generally, hammers can be divided into a few categories. First and most relevant are ordinary hand hammers of a moderate weight that can be used for common forging operations. Claw hammers, although I suppose technically usable, would not fall into this category. Simply put, they are not heavy enough for anything other than very light forge work. Instead, I would choose a forging hammer between 1 and 3 kilograms. My first forging hammer was a 1kg (2.2lb) Swedish pattern hammer, but over time I grew more accustomed to the weight of a 2kg (4.4lb) Nordic pattern. The two main parts of common forging hammers are the face and the peen. Usually, most people have heard of ball peen hammers, whose peen is just that, a hemisphere 'ball'. In most forgework, however, the peen is a 'line' oriented in various directions and used for moving metal in a specific direction (perpendicular to the long edge). Cross peen hammers are the most common, where the peen is perpendicular to the handle. There are also straight peen (parallel to the handle) and cross peen (at some other angle, usually 45 degrees, to the handle) hammers. One general point on hammers is stay clear of those synthetic handled things (bottom left of the below picture). They are awful! Plain old wood is as good as it gets. I've never gotten more blisters and fatigue than when I've used a synthetic handled hammer, even of lighter weights. Some people use them, but I've never come across one that's been worthwhile.
 |
| Top Row- Rubber mallet, Polishing hammer, Raising hammer, Rounding hammer, Forward Weight/Dog's Head hammer Bottom Row- Awful hardware store hammer, 1kg Swedish Pattern, 2kg Nordic Pattern, Scything hammer, Ball Peen |
Second, there are sledges. These are heavier and generally meant to be used with two hands and for striking, but I find that they are handy for single hand work when there's no one there to help and a lot of material to move quickly. Also for punching, slitting, and drifting. The heavier the hammer, the deeper the penetration of force through the metal you are forging. For example, when I raised a ring out of a silver quarter, it was many quick blows with a light hammer. When working down a billet of steel, there is a classic problem of 'fishmouthing' which happens when the sides of a bar move faster than its core, causing the outermost faces to bend over in a U or V shape, creating a cold shut. Heavier hammers or heavier blows help reduce this effect.
 |
| Top- Flatter Hammer; Middle- One Handed Sledge; Bottom- Two Handed Sledge |
Third are all manner of speciality hammers for more singular purposes. I have a handful of these for operations like hot cutting, flattening, planishing, raising, chasing, engraving, etc. Starting out, I would stay clear of these sorts of hammers unless or until you are intent on pursuing a part of the craft which demands them.
Finally, there are power hammers. These are mechanical hammers (electric, pneumatic, helve, etc.) that comprise of a movable ram and a bottom die which act as a paired hammer and anvil. These are capable of hitting much harder and faster than people and can accomplish a number of operations such as drawing, fullering, bevelling, flattening, and bending. While nice to have, I have never owned one and gotten by just fine (although they are a pleasure to use and I intend on getting one someday).
One of the most important considerations for hammers is properly dressing the face. Upon first receipt, it is rare that a hammer's face will be perfectly dressed for forging. Of course, there are many different ways of doing this depending on the ultimate purpose, but I will address the general, introductory hot work scenario. A hammer's face should have a slight crown to it, meaning convex, but not so much that it appears 'round'. Avoid any hard lines, which many hammers have on them out of the factory. A chamfer between the sides and the face is fine, but hard corners on the face edge of the chamfer is no good. Take a file or sander of some sort and smoothly blend it. Finally, make sure that there are no significant cracks, chips, or gouges on the face. Forging hammers are often much softer than claw hammers because they are always striking something much softer (hot steel) and it would be potentially catastrophic to strike an anvil's face directly with a fully hardened hammer. Because of this relative softness, using them to bury nails or chisel things, the face will more easily dent and become fouled. Many people are surprised at how effectively those scratches can transfer into the metal being forged. In addition to the flat face, it is important to dress the peen. The edges should, again, have no hard lines on them, especially including the short edges. However, contrary to what might seem intuitive, the face should not be overly rounded (like a round bar cut in half). Instead, keep the peens flat with a slight crown. This is because the force distribution will be much more manageable with a flatter peen than a rounder one. The goal with drawing is not to make as deep of grooves in the steel as possible. Rather, to spread them controllably in two directions (forward and away or side to side) rather than in all directions at once. Take a moment and dress your hammers!
-Anvils-
Anvils are one of the tragically misunderstood parts of blacksmithing. Although it is getting better now, in the past I saw enough 'yard art' anvils to make me weep. As a result, their price was driven up artificially high to preposterous rates and those who actually needed them were unable to get them. And, what is more, there used to be a bit of a stigma (again getting better) about using things that do not look like anvils as anvils. For those starting out, a sizeable block of mild steel will do you perfectly well. From a scrapyard, you can get a formidable block of steel for scrap prices (cheap). It does not need to be hardened, it does not need to be a tool steel, it does not need to have all sorts of geometric features found on other purpose made anvils. For blade work, having a flat, unbroken face is all you need. I have a 165# Refflinghaus anvil which has been very faithful to me, but before that I had a 35# cylinder of mild steel that I used for years. It isn't the tools that make the craftsman, it's how you make use of what you have.
 |
| My first real anvil, 165# Refflinghaus, with a shop made fullering jig and Oakeshott Type X sword being forged |
For some reason, railroad track anvils are incredibly common. I have never used one so I will not comment on them too much, but a rectangular block of solid steel will do better for the majority of things. You will probably not make effective use of any bick or heel you cut into it and the distribution of mass is terrible. Ideally, you want as much mass under the face as possible. Honestly, I would probably turn that rail track on end and use the cross-sectional face before using the rail face itself. Having that web between the rail and the foot greatly reduces what is almost a seemingly ideal shape. Again, mass under the face. One of the best anvils I have ever used was a large sawyer's anvil, which is essentially a rectangular block with feet. No horn, no bick, no holes. It moved metal incredibly fast and was dead silent.
If budget is a concern, turn to the scrapyard. If you don't have one nearby, check out the 4" square block anvil from Old World Anvils. It's hard to beat that. You get a hardened block with flat faces, and both square and rounded edges.
Although long term I would definitely recommend having available a hardy hole and pritchel hole, some sort of bick and maybe a ledge or step on the face of the anvil (or a post vice to hold hardy tools and stuff) to begin it is absolutely not necessary.
-Forge-
This is the last of the big three. Finding a forge can be difficult or expensive, but it is very easy to make one. I have built around half a dozen propane forges now, both venturi and forced air, and used a collection of hand crank and electric blower coal/charcoal/coke forges. You can make a forge by digging a hole in the ground and feeding a hair dryer attached to a pipe into the side of it. Not only does it work, I've made steel in setups like this. Starting out, there are advantages and disadvantages to each.
 |
| My first forge, a 1 burner Venturi forge from Diamondback Ironworks. After almost 5 years of regular use it's been delegated to be a casting forge. |
In propane, the work is almost always visible, which can be very helpful especially in heat treating. Additionally, it is much harder to melt or burn steel in propane forges. Also they are generally a little more acceptable in urban environments. Usually if a place allows propane grills, there is little wording that can exclude a propane forge under the same regulations. Not, of course, that you should be doing anything in an unsafe environment. I've written a few things about propane forges in the past, so I'll be brief with this part. If you want to build a simple propane forge, check out the Venturi Forge Build posts over here.
 |
| Sparks from lighting a coal forge |
Solid fuel presents another set of questions entirely. I think they are simpler to make and solid fuels are generally cheaper than propane. However, burning coal makes a bit of a mess and can look bad to the neighbours when the volatile gasses burn out. I have come to prefer burning coal or coke over propane, but that's personal preference. As I mentioned earlier, building a simple solid fuel forge can be incredibly easy. All you need is a fuel like coal, coke (coal with the volatiles burned out, which burns cleaner but is harder to maintain in the firepot), and charcoal (hardwood lump charcoal if you're getting it from any old hardware store, NOT those compressed briquettes). You can even burn plain old wood, but it burns extremely quickly and produces a lot of ash, so I would not recommend it. In addition to the fuel, you need an air source. Bellows, blowers, cranks, whatever gets the job done. Hair dryers are great because the volumetric flow of air is not too high like the discharge of a shop vac or leaf blower. Finally, you need some sort of containment. Either in the form of a firepot (recess where coals sit and the air comes in) or a taco shaped enclosure where the air enters through the side. If you are interested in building one, do a search for it, but I won't be going into it here. Brake drum forges are extremely common for a cheap, easy firepot. Alternatively, you can probably find new or used forges online or at antique shops or flea markets.
-Tongs-
I've always stood by the saying that the best tongs are the ones still attached to the thing you are making (i.e. no tongs, just hold onto it). However good tongs may be at holding things, they are never perfect. What is more, there are rarely tongs that can hold different shapes of things with the same effectiveness. Part of the difficulty here comes from the necessity of being to work on different sides of the thing you are making without setting it down and adjusting how you are holding it. For that reason, there are a few sorts of tongs which are really good and those which are really bad at doing what they need to do. There are box jaw tongs and V bit, flat tongs and hammer eye, pick-up and blade and farrier's tongs, chain makers' and bolt tongs, scrolling tongs, ring tongs and rivet tongs and the list goes on and on. The point is, there are tongs made for just about everything you make while holding stuff with them. While it may seem silly, the shape of the stock and what you are actually doing with it matters a great deal as to the design of the jaws. A final note I'll make that a lot of beginners don't understand is that tongs are not meant to always fit the thing you are holding without modification. The first thing that should be done is fitting the stock to the tongs. Heat up the jaws and fit them to the stock either with a vice or light hammering. This means changing the distance which the tongs close and how far the reins come together when closed, NOT mangling the shape of them to force your jaws into submission around the shape of what you are holding. That is why there are different shapes of jaws. Of course, slight shape adjustments may be necessary, but being drastic is what I'm trying to avoid here, and why very few people only have one set of tongs.
Because the variety is endless, I'll mainly be talking from here on out about tongs as they relate to bladesmithing where the stock is generally thin and rectangular.
 |
| Some tomgs I've made. Left to Right- Square/V-Bit tongs, Wolf's Jaw tongs, Bodkin tongs, Blade tongs, Pickup tongs |
First, there are 'wolf's jaw' tongs. These were the first ones I ever used and the first ones I never wanted to use again. For some reason they are really common, as the jaw shape deceives you into thinking it can hold all sorts of shapes. In reality, it can. And it does, This is one of those rare occasions where it holds a lot of things relatively consistently, but the catch is that it does not hold any of them very well. The little nubs or 'teeth' can accommodate various diameters of round stock perpendicular to the reins, or flat stock when parallel to the reins. In the middle of the jaws there is a groove which can seat square or rectangular stock when rotated so as to fit the opposing corners in that slot, or by the same mechanism round stock oriented parallel to the reins. The problem is, unless you have several sizes of jaws, nothing really fits well enough that it won't jump out again.
If something isn't conducive to blade tongs or box jaw tongs, I'll turn to pickup tongs before reverting to the wolf's jaw. Pickup tongs have narrow ends to the jaws and are good for picking stuff up (which can be much harder than it sounds). By the same token, they are good for holding the flats of a rectangle or the turning over a billet as it comes up to temperature in the forge. For large billets that do not fit inside the jaws of other tongs I have, pickup tongs are my go to. If I had to have a single pair of tongs, it would be these, but I would still rather not have only these. And for that reason, these are the first pair of tongs I made.
Next up is a category called blade tongs. These are meant for exactly what it sounds like. Holding blades (or blade shaped stuff like thin rectangles). Although there are a few different designs for the jaws, the concept is the same. On each jaw, there is a U shaped channel that holds onto the edge of the stock. When the two U jaws come together, it holds the stock very securely and prevents it from jumping out. Sometimes, the jaws are offset so the length of the thing you are holding can be fed back towards the reins of the tongs an indefinite amount (instead of running into the pivot or end of the jaws). These are fantastic for their versatility and stability in what they hold. Some of the limitations are the thickness of the stock, being too thick it would not fit and too thin might rotate about. Also, the width. Too wide and the tongs might not be able to seat properly on the stock (fixed to an extent by hot fitting the tongs at the beginning of the project), and too thin the tongs will not be able to close at all on the stock. Having a few sizes of blade tongs to accommodate various widths of stock would be well worth it (for a bladesmith).
The last one I will talk about with regards to bladesmithin is the Box Jaw tong. One jaw is a broad [ while the other is flat and seats down inside the flat of the [ jaw. These are similar to blade tongs in that they are good for holding onto wide, thin stock. Of course, if the stock is wider than the channel of the [ side, it will not work. Similarly, if the stock is too thick, the flat jaw will only be able to close down on the very end of the stock and not hold it sufficiently tightly. I don't personally own any of these, but they are useful if you have a few different sizes available.
A final note on tongs is that you should be able to make them yourself. That doesn't mean you should only have tongs that you have made, but it is a very useful skill. I have made all my own except that first pair of wolf's jaw tongs, some of which are for very specific purposes that are not commercially manufactured. Not only is it going to be better suited for the intended use, but it is an excellent exercise in many of the common forging operations (drawing, punching, drifting, slitting, upsetting, forging corners, rounding, half faced blows, riveting, planishing, general hammer control).
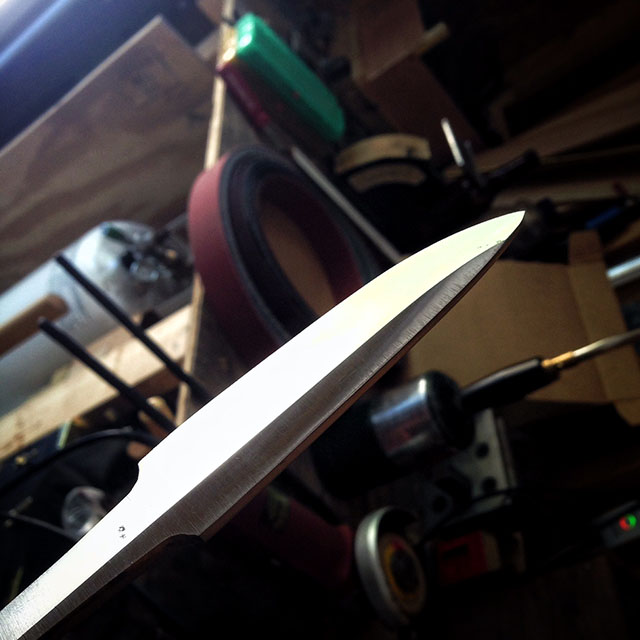
-Shaping-
Post hot-work shaping is, for the bladesmith, where I find the majority of time is spent. The old adage 'ten minutes at the forge is an hour at the grinder' is spectacularly true, especially when the tools available are very simple. You do not need a fancy grinder to make good blades. In fact, I would say that you will be better if you can take the time to learn some of the slower methods first so that you can develop a better sense of patience and attention to detail before moving to something that is capable of instantaneously destroying hours of work.
Removing the firescale from your forgings is a critical step in any finishing process unless you want to dull files and burn through sandpaper. I am talking about those areas you want to grind, not whatever you might be leaving on for aesthetic reasons. The most efficient method I have seen is using a masonry cup/wheel on an angle grinder. For whatever reason, those things annihilate scale. While awful for shaping the steel itself, I highly recommend them for the initial cleaning. Alternatively, you can dissolve the scale (a form of iron oxide) in vinegar or sodium bisulfide (sold as pH- for hot tubs or pool maintenance). After a soak overnight, the scale just wipes away.
Drawfiling is a great way of refining the shape of a blade. It is easy to keep things flat, to prevent the introduction of ripples or twist, and makes you want to appreciate hammer control while forging. Beware of where you get files from, however. I never get them from the hardware store because, although they may be made in the same factories as their substantial counterparts, they are NOT THE SAME! This is the classic example of quality disparity between what you get at the big box store and what you get straight from the manufacturer. If you do order them online, look for mill and bastard files. Older Simmonds (they were recently bought out) and Nicholson files are good, but there are other reputable manufacturers. One of the largest drawbacks is what to do after heat treatment. Either the files will not bite at all or the blade will be hard enough (post tempering) that it will wreak havoc on the files.
 |
| Refining a forged fuller in a sword using a 2x72 grinder |
Belt sanders are the bee's knees. I started out with an extremely cheap 2x42 .25hp grinder and still routinely use it to this day. Do you need one? No. Does it help? Yes. A few years ago I got a 2x72 grinder and the combination of a variable speed, substantially increased horsepower, and the versatility in platen/contact wheels and tool rest, and increased belt length have been fantastic. That does not mean, however, that drawfiling has become obsolete. I can get a flatter, truer finish from files, especially on sword blades where the flat surface is fairly long. As with files, the belt matters a great deal. Generally, you get what you pay for. The more expensive belts last far longer and cut more consistently than their cheaper doppelganger alternatives. That does not mean that you cannot use them and achieve good results, but in the long run I have found it cheaper to use the higher end belts (Norton Blaze, 3M Cubatron for low grits; 3M Trizact for good finish on higher grits) in the long run than opting for the cheap per-belt prices.
Sharpening is one of those things where you can spend an infinite amount of money and still be looking for better results. For the entry level sharpener, I would recommend getting high grit belts for a belt sander and maybe a final higher grit stone. For years I used my 2x42 grinder with 1x42 belts at 400, 600, and 800 grit belts, which with a little stropping gave very quick edges that were shaving sharp. I have moved onto belts up to 2000 grit and stones up to 8000 grit, but that is mostly for woodworking tools rather than functional knife edges. For what I use working knives for, an ultra sharp edge is not important, because it is not as durable as a still sharp but not quite so sharp edge.
Sourcing Material
In bladesmithing, the steel is one of the cheapest parts but definitively the most frequent area where people try to use cheaper things. I don't know why this is or why it makes sense to those people, but it does not need to be that way for more reasons than one.
Before going any deeper into this, I need to say something about rail spikes. I don't care who you've talked to or what you've read, but the HC spikes ARE NOT HIGH CARBON STEEL. High carbon steel is defined as having between 0,55% to 0,95% Carbon, and the highest carbon content in a HC rail spike I have ever seen is 0,39%, but more typically around 0,30%. Yes, they are higher carbon than their non-HC counterparts (~0,12% C) but they are woefully insubstantial for producing quality blades. Does this mean you cannot make knives from rail spikes? No. I have done it and you can get a functional edge on them, but it is not an effective use of time if you could instead have made that same knife out of high carbon steel. If you are forging them 'for practise' you aren't fooling anyone. Yes, you can learn hammer control and a lot of good basic forging operations, even make a functional knife as the result of it, but the metallurgical science behind heat treating is more complicated than holding something to a magnet and sticking it in some liquid. To learn proper heat treatment is more important than learning proper forging (you could just grind the whole thing without any forging at all) so it is in essence a wasted opportunity to forge an entire blade and never bother learning the heat treating side of it.
One of the most common things I hear about rail spikes is that they are so cheap (free). That usually means hiking around a rail bed and picking them up. Unfortunately, this is absolutely illegal. Do people still do it? All the time. Would I recommend it? Nope. There are plenty of places to get cheap steel to forge, and if you are going into it with the intent, please look for blade quality steel of a known alloy instead of something that has the illusion of being cheaper. It's marginally less expensive than you might think to get blade quality steel. Now let's say that you already have a bucket of rail spikes and don't want to spend money on steel. In the short term, it's a great way to learn a lot at a low cost. Make all sorts of stuff out of it, knives included. Although I'm still a proponent of using known steel of a high quality, you can make functional knives out of rail spikes despite what anyone might tell you. Yes, they are overwhelmingly inferior to a high carbon steel if you heat treat them properly, but the spikes will certainly get the job done. As I said above, that understanding of heat treatment is as important as all the rest of the process combined, and the best way to learn it is by starting with something predictable.
Now that we have that out of the way, let's talk about steel. There are more grades of steel than I care to discuss here (look for the posts in the metallurgy section called 'on Iron' for that) but it is important to understand a little about them. For blacksmiths, plain old mild steel is probably the best thing out there because it is so forgiving and does not need to be heat treated. For bladesmiths, it gets a little more complicated. The amount of carbon determines how hard the steel is able to get when properly quenched. Typically, blade steels fall around the eutectic point for carbon and iron (~0,76%) but are generally a bit on the higher end, up to around 1,1% Carbon. For the purposes of this simplified discussion, all that really matters is that alloying other elements into the iron/carbon lattice change its properties. Becoming familiar with a material and understanding how to manipulate it is the essence of what it means to be a bladesmith. By using insubstantial materials, it becomes more difficult to predict how they will act and react, but more importantly how other materials behave. For instance, using 5160 leaf springs may be fine, but they may also not be 5160, or be riddled with micro fractures that cause catastrophic failure in heat treatment, retain spring memory from its life a spring and cause uncorrectable warps during heat treatment, or any number of things that could have been easily prevented with new, unformed 5160 for about the same price whose history. composition, and certification is guaranteed. I am not trying to say that you should not scavenge materials. Absolutely do, get practise, use them for tools, but don't rely upon them.
One of the most common things I hear about rail spikes is that they are so cheap (free). That usually means hiking around a rail bed and picking them up. Unfortunately, this is absolutely illegal. Do people still do it? All the time. Would I recommend it? Nope. There are plenty of places to get cheap steel to forge, and if you are going into it with the intent, please look for blade quality steel of a known alloy instead of something that has the illusion of being cheaper. It's marginally less expensive than you might think to get blade quality steel. Now let's say that you already have a bucket of rail spikes and don't want to spend money on steel. In the short term, it's a great way to learn a lot at a low cost. Make all sorts of stuff out of it, knives included. Although I'm still a proponent of using known steel of a high quality, you can make functional knives out of rail spikes despite what anyone might tell you. Yes, they are overwhelmingly inferior to a high carbon steel if you heat treat them properly, but the spikes will certainly get the job done. As I said above, that understanding of heat treatment is as important as all the rest of the process combined, and the best way to learn it is by starting with something predictable.
 |
| Satirically forged reclaimed San Mai sax with a core of lawn mower blade and a jacket of rail spikes |
Some easy and forgiving steels to begin with typically fall closer to the eutectic ratio. 1075 and 1084 are great starting steels because they have a larger working temperature range, are easier to heat treat, and are relatively inexpensive. If you cannot get those or something else is more readily available, by all means use that. But whatever you use, become intimately familiar with it. Use it for everything. Learn its heat treating processes, its forging temperature range, how to normalise it, what temperatures to temper it to for your desired hardness. In short, use it and that alone until you become an expert in it. When you are comfortable with it, you have not only accomplished something with that particular steel, but you have also learned to understand the underlying processes without introducing unpredictable external variables.
 |
| Straight laminate pattern welded blade, the first successful forge welding I ever did, with cast bronze fittings |
For blades, I cannot recommend enough that you keep to a single steel for a while, sourced from a reputable supplier like The New Jersey Steel Barron. But for other things, there are infinite opportunities. I have made hot cut tools from racecar axle, hammers from prybars, punches and dies and scribes from dozens of varieties of steels, tongs from mild or whatever happened to be lying around. There are times to practise technique and there are times to learn chemistry. Use every opportunity. Did I know anything about heat treating H13 the first time I used it? Absolutely not, but that does not mean I passed up the opportunity and treated it like something else.
You can make anything from anything, as long as you are willing to have reasonable expectations of success and where your skills fall into the process. I made a rail spike knife, but only after I was comfortable making a San Mai billet without power tools. I made a knife from old flatware, but only after I learned how to melt it down and adjust the carbon content to produce a hardenable blade. It's not only about what you know, but how you use it.
First Projects
It's incredibly tempting to jump right in an make that thing you've always wanted to make, to light the forge for the first time and to come out either victorious or defeated. I'm not here to tell you that there is a right and a wrong way to do things; the number of times I have had to do things the 'wrong way' because circumstantially there was no other possible way is about the same number of times I've done things at all. Don't let anyone tell you, with the exception of things that are inherently dangerous, that there is a wrong way. Sure there may be a better way, but yours also might be that better way.
-Making Stuff Round and Square-
I have introduced a handful of people to very basic hot work, and I always do it the same. It might not seem glamorous, exciting, or even interesting, but it develops a few fundamental skills. Take a bar of mild (or whatever, but mild is the most forgiving...) and forge it to a square. Then, forge it back to round. Take down the corners so the square becomes an even octagon, then take those corners and make the entire thing round. Take care to planish it (make it smooth) and avoid striking amiss. Develop hammer control, being able to predict where the hammer's face will fall and at what angle. Try to avoid striking with the edge or corner of the hammer. Learn where to hold the stock so it doesn't jump around when you hit it. Yes, it may seem utterly futile, but if you don't inherently have the manual dexterity going into it (some people do, some don't), chances are that other first thing you make will need some help. Use it as an opportunity to understand how hard to hit for what sort of effect. Do you need to smash it into oblivion, or lightly take down the high spots? Understand the parts of the anvil, where to strike, where not to, how to not hit the face of the anvil with the edge or corner of the hammer. Think you have it down? Great! Now make that same thing but instead of keeping the entire bar the same thickness, draw it into a taper. First square, all the way to the point. Make the point as sharp as you can with only hammering. Then turn it into an octagon and then round.
-Forging Hooks-
Comfortable with your level of hammer control? A good first project is a simple blacksmith's hook. A while back I wrote this post on Forging Hooks which covers a number of great skills. Even for a bladesmith, learning how to move steel is a great thing to know. Maybe try slitting the top end and scrolling it so you can put two screws through it. Or possibly make two hooks on a single bar. Whatever you want, the only limitations are your creativity.
 |
| Old and terrible picture of the first hooks I forged |
-Simple Knives-
What are you interested in? Once you have a good understanding of your skill and your equipment, do what you enjoy doing. All that potential frustration of the learning curve's front end will be behind you. Start small. If you want to forge swords (I did, and that's what brought me into the craft), master the fundamentals. Learn how to make things flat and parallel. Learn heat treating. Finishing, polishing, sharpening. All that stuff that makes a sword but on a smaller scale. I've spent hundreds of hours on single swords, and that was after making smaller things for years. I didn't really make my first sword until about 4 years into the journey. Is there a right or wrong way to do it? No. But there is a way that will hopefully lead to greater fulfilment. I know that, for me personally, had I started with swords, I would have become immensely frustrated by all the things I did not know. So I would start again by finding a style of knife I really enjoy. Then make lots of them. Learn the form. Learn control. Learn making things to a design. Find mastery through repetition in each step of the progress, then move on.
 |
| Puukko blade, a simple working knife of Finnish origin |
-Tongs and other Tools-
Need something? Make it. That's been my mentality and it has served me very well. Don't have that pair of tongs you need for whatever project? Make them. Learn the processes either by examining existing models or design them yourself. There are any number of tutorials out there to get you started. If you make yourself one tool a week (however big or small), not only will you have learned something from it and honed your skills, but you will also have that tool to use at the end of it. I've made tongs, hot cuts, punches, dies, nail headers, hammers, forges, anything and everything that I might need. Usually, it doesn't need to be pretty to get the job done.
 |
| Various rough shop tools. Top- Nail header for the pritchel From Left to Right- Cube Twist centre punch, hot slit chisel, hot punch, square drift, hot chisel, bodkin template |
 |
| Assortment of other tool-making tools. Top- hammer eye tongs From Left to Right- Hot Cut hardie, Centre Punch, Hot cut chisel, hammer eye drift, axe eye drift, hot punch (without its handle), double calipers |
Forge Welding
Forge Welding is an extremely exciting and visually interesting technique that draws many people into the world of bladesmithing. Joining individual pieces of steel with fire and a hammer is something that will never cease to amaze me, and however long you are at it, there will always be things to learn and explore. Whether functionally or aesthetically, the process allows for a world of opportunity and ingenuity that speaks for itself. If you are interested in learning the process, please see the linked post below-
Intro to Forge Welding
Intro to Forge Welding
 |
| Meteorite spear during the final weld. Collaboration between myself and Dave DelaGardelle |
Final Thoughts
Expectations when met with reality can sometimes be difficult, especially when approaching something with very immediate and tangible results. Find encouragement in success, and opportunities to learn in failures. I've broken more blades than I've finished and scrapped more projects than I've seen through to the end. It's important to be able to recognise a progression of skill and the incorporation of other skills to produce a final result. Bladesmithing is a unique craft in that it is not the sole result of any one discipline. Rather, I've found I've needed to understand not only metal forming, but chemistry, fabrication, casting, carving, leatherwork, woodwork and joinery, inlay, stone setting, design, and a host of other areas which in themselves comprise trades to which people dedicate their entire lives.
Most importantly, it is the journey which makes the trip worth taking. It is your journey, and you can share it with others, bring outsiders into it, or hold it as something of a private undertaking. For years I have been astounded with how open the community is with the welcoming of beginners and old masters alike, with the sharing of information, and the unfailing help and constructive criticism it provides. Without the larger community and the people I have met along the way, I likely would not have come into the craft to begin with. It is what you make it; a wide world lies out there of history and culture, of unsolved mysteries and dying techniques. With luck, anyone with even the slightest amount of interest can find their part in it.
Finding the right tools, materials, space, time, motivation are all something that, when combined, will more often dissuade than encourage. Too often we come into a practise with a preconceived idea of what it ought to be like but without the firm knowledge of what it can actually be. There will be people out there who say things can only be done one way, but I say that they are not truly invested or keen in what they are about if it has become so solidified to their practise that all creativity in accomplishing that task has gone. Ultimately, you can do anything with anything, any way you like, and that is the beauty of craftsmanship. Sure there may be better or worse ways of doing things, but being able to say that something is a wrong way of accomplishing something, provided it actually does accomplish it, becomes valid only when someone has complete understanding of a process, and I can guarantee that no one ever will. I began using an acetylene torch clamped to a bench as a 'forge' because it was the best I could do. Really, it does not matter how you do things or what you use to do them as long as you can find a way to satisfy the desire and motivation that encouraged you to try.
As someone who began without instruction or direction, I understand what it is like first beginning without a solidified idea of what it takes to get over the line of having motivation without skill and ideas without tools through which to implement them. Experience does not need to be an accumulation of technical skill or hoarded knowledge of techniques and history. Rather, it is simply knowing the right questions to ask. And, from the perspective of those who have been at it for a while, not allowing proficiency to cloud the ability to see things from the lens of a beginner. Often, we very easily forget what it is like when we first start doing things, that barrier of knowledge and expectation, and through it replace our early reservations and uncertainties with the foundation of what we have learned such that it becomes a more complete picture going forward. I remember well what it was like forging my first steel, but I have very little memory of what I did not know and how that disaffected my approach. Instead of holding onto that experience, we tend to instead fill those holes in our knowledge and it can cause us to adversely react to the situation of others who have not yet fully begun their journey. If you are just now starting or if you have been with the craft for a lifetime, I would urge you to to try and see past that blindness for the sake of those who come after you so that they too may be able to later share the knowledge and passion of their journey without turning others away in those very first moments of questioning uncertainty.
**This is a working document. I will be adding to and updating this, as with my links page, as I think of new things to include.**
Finding the right tools, materials, space, time, motivation are all something that, when combined, will more often dissuade than encourage. Too often we come into a practise with a preconceived idea of what it ought to be like but without the firm knowledge of what it can actually be. There will be people out there who say things can only be done one way, but I say that they are not truly invested or keen in what they are about if it has become so solidified to their practise that all creativity in accomplishing that task has gone. Ultimately, you can do anything with anything, any way you like, and that is the beauty of craftsmanship. Sure there may be better or worse ways of doing things, but being able to say that something is a wrong way of accomplishing something, provided it actually does accomplish it, becomes valid only when someone has complete understanding of a process, and I can guarantee that no one ever will. I began using an acetylene torch clamped to a bench as a 'forge' because it was the best I could do. Really, it does not matter how you do things or what you use to do them as long as you can find a way to satisfy the desire and motivation that encouraged you to try.
As someone who began without instruction or direction, I understand what it is like first beginning without a solidified idea of what it takes to get over the line of having motivation without skill and ideas without tools through which to implement them. Experience does not need to be an accumulation of technical skill or hoarded knowledge of techniques and history. Rather, it is simply knowing the right questions to ask. And, from the perspective of those who have been at it for a while, not allowing proficiency to cloud the ability to see things from the lens of a beginner. Often, we very easily forget what it is like when we first start doing things, that barrier of knowledge and expectation, and through it replace our early reservations and uncertainties with the foundation of what we have learned such that it becomes a more complete picture going forward. I remember well what it was like forging my first steel, but I have very little memory of what I did not know and how that disaffected my approach. Instead of holding onto that experience, we tend to instead fill those holes in our knowledge and it can cause us to adversely react to the situation of others who have not yet fully begun their journey. If you are just now starting or if you have been with the craft for a lifetime, I would urge you to to try and see past that blindness for the sake of those who come after you so that they too may be able to later share the knowledge and passion of their journey without turning others away in those very first moments of questioning uncertainty.
 |
| Progress photo of a forged chandelier frame |
**This is a working document. I will be adding to and updating this, as with my links page, as I think of new things to include.**
Just wondering if you made the Cube Twist centre punch? If so is there any chance you could do something on how you made it?
ReplyDeleteI did, and it just so happens I made a tutorial on that precise piece!
Deletehttps://shardsofthedarkage.blogspot.com/2015/01/cube-twist.html
Thank you for posting the great content……I found it quiet interesting, hopefully you will keep posting such blogs.
ReplyDeleteWelding Stainless Steel Sheet Metal
Cheers!
Delete