
The first thought was to use a rack to press into a bar with which to form the teeth. Based on the tooth shape having a slight trapezoidal profile on one side, it seemed like the perfect fit. The above bar is 8 teeth per inch, and in person looks like it would make a nice tight pattern. However, the depth is too shallow and the spacing too tight. For reference of what that looks like in steel, look at the below sax blade that we made as a test piece.

There is a faint strip of wrought between the twists and the edge, and although difficult to see at first it has a slight wiggle. Part of the problem with the rounded bits is that the blade was drawn out a little during forging, and even that deformation was enough to turn the squared corners into a sort of sinusoidal deal. Due to the spacing, another reason that this is not ideal is that the cut depth of the teeth is too shallow to reasonably achieve with a chisel without bending the previous teeth over and closing the gap. That leaves cutting them with a hack saw or modern equivalent, but looking at the originals the continuous grain patterns are mostly suggestive that they were mostly not done that way (not to say that some of them couldn't have been).

The next one we tried was using a 6 tooth per inch rack. The spacing and depth is much closer, but still too tight for the reference spear. I would expect this to work better than the 8 TPI rack because of the extra depth making the weld more resilient to shape changes, but we wound up discarding this due to its size and regularity. Also, the rack forms a sort of positive die where we need a negative one. The wrought almost universally has the flats in its troughs and the edge bar has points in its troughs, the opposite of what would be formed by pressing the rack into the edge billet. While you may be thinking that we could simply press into the wrought instead, I do not think that is how they were made for four main reasons. First, the wrought is incredibly thin (not from grinding) where it joins with the next inward bar, and would not be strong enough to support being used as a die. Second, the wrought itself is fairly soft compared to even a hot edge bar, and the teeth would deform opposite how it appears in the historic patterns. Third, the tooth points are sharp in the wrought, which is very suggestive that the edge bar started with a sharp groove that the wrought filled into, which is reasonably the order it must have been done given the available technology. Last, the grain of the wrought in the teeth is very obviously continuous in most cases, which means the forging of a toothed bar at such regularity would be absurd with the relative ease of instead notching the edge bar... All that is the long way of saying that we abandoned the racks and went to something else.

To get the spacing as accurate as possible, we took a 1:1 scale print of the Lapland spear and measured the tooth spacing. Because of the other indications in the pattern, I found the sections which would have been drawn out the least by subsequent forging and averaged the geometry from the two halves. The final result is a hair under 4 TPI and a depth of 4mm.

On the test bar, all of the teeth were cut based on the tooth previous so any error doesn't compound and gradually increase the size the farther down the bar. Doing this enough, it would not be difficult to maintain an acceptable accuracy doing it freehand, which eliminates the need for dividers.

With the lines scribed, I took a cold chisel and cut just enough for there to be an easy surface to register against. The idea is that these lines are just a guide for a hot chisel.

And finally, cleaning it with a file for the sake of being tidy. Not necessary, and again another thing that would not be needed to do this with a more limited toolchest.
To cut the teeth to their full depth, we made a hot chisel with a taper close to the final shape but a hair steeper to accommodate the distortion from material spreading.

Once we got to cutting the teeth, Emiliano called the hits, Luke struck with a sledge, and I held the chisel. Each heat we cut between 3 and 4 teeth, each to roughly 80% depth. I think this was critical for a few reasons. For one, it made us a lot more aware and had more control over how deep they will be. But it also minimises the deformation of teeth side to side (closing the gaps of the tooth before it) and leaves room for fixing any closure that may have happened during the second pass.


Something that became an issue later on was making sure the edge bar is square and, most importantly, that the top and bottom are parallel. Holding the chisel straight up and down and control of the depth by adjusting the teeth via striker were both fairly easy to correct as we went.


For the first pass, we cut to the aforementioned depth, and without a scribed depth line it was all strictly by eye and in reference to the previous teeth. By the end, we were a bit more confident in the process and one end came out a little better than the other, but all in all remarkably consistent for what it is.

This is the edge bar after the first and second passes. What we did during the second served both to make the depth more uniform as well as ensure that the cut from side to side did not vary. Luke struck more lightly for obvious reasons, which fine tuned how far we able to recut each tooth. Overall, the forward/backward distortion was far less than I expected, and the reopening of any skewed tooth was almost an after effect. Even now the occasional slight rounded tooth is evident, almost exactly like in the Lapland spear.

Because we are using home made steel, there was a little bit of splitting that happened across the grain. It did not prove to be detrimental in any way, and eventually either welded closed or was filled partly with wrought like the teeth.
In order to hold everything together, Emiliano and I held it with tongs on either end while Luke and Eli forged the wrought into the teeth with sledges. The test sax in the first post was done using the press, and worked better because it was so short. By comparison, the length of this one was too much for the distortion that comes from the spreading as it fills the teeth. It can certainly be done in a press, taking care to go slowly and straighten/align everything throughout, but strikers ended up being the most successful.

Having parallel surfaces now is where it really matters most. A slight cant to one side or the other makes the wrought extremely prone to shifting during the forging. To counteract the deformation of the wrought, we tried starting with a wider piece so that there would still be something covering the teeth if it skewed out to one side or the other, but that difference in width also made it more difficult to hold tight to the edge bar. Since the edge is cold and acting as a die, simply tack welding the ends doesn't work.
In order to get the teeth formed, we took the first pass and hammered the entire length so there was always something to register against. In the subsequent heats the forging was more localised and worked from one end to the next. The approximate depth is fairly easily judged by the cooling patterns in the wrought. As a sort of byproduct from the original proportions, the thinness of the wrought above the teeth allows the tops of the edge bar to cool that same pattern into the wrought as it is worked. Similarly, that final thickness of the wrought is almost the same as the overall starting thickness. By having the layer fairly thin (~5.5mm for a 4mm deep tooth), it deforms into the edge bar far easier than it would with a thicker bit of wrought.

Thankfully that wide tooth on the first end we cut on the edge bar served as a solid reference point for realigning the two halves. After forging, there was a bit of flashing left over where the wrought curled down over the edge bar. Based on the previous test pieces, the outside corners are were any weld flaws accumulate, the tiny pockets trapping flux or scale. However, grinding the edges flush significantly reduces this. From what we were able to see, the wrought teeth make first contact in the centre of the edge bar during forming, working outward to the edges. This is extraordinarily convenient because it does not trap anything inside the welds if there is a space for it to escape.
We also found it quite helpful to forge the wrought teeth up, but then during the final pass flip it over so the wrought was on the anvil and use the stability of the edge bar to straighten everything out.

Prior to welding, the bars were soaked briefly in muriatic acid to dissolve scale and then wire wheeled. Cleanup of the teeth with a file does not seem ideal due to the irregularity of the cuts.


Post-weld, the teeth looked fantastic. There were a few slight pockets on the outside of the tooth corners, but only to a depth of half a millimetre or less, and disappeared when we forged it into a blade.

Those few voids near the centre teeth look alarming, but were actually quite shallow. With this edge bar and wrought welded, we took some additional steel and made a few opposing twists and more wrought for the spine.
The meat of the project was home made steel, and in the end we used what would have been the tooth layer as the spine. For the core, there were three layers of opposing twist.

Most of the steel was unconsolidated prior to the project, and the above is a bit of shard steel from Scott Roush's hammer-in several years ago.


The twists were a little precarious and sheared in a few places, but that is part of the uncertainty of using home made steel.

After twisting and squaring, the bars got the same treatment with the wire wheel and were ready for welding. At this size, the bars are more or less the same thickness as the tooth bar, which is to say fairly small. Minimising deformation of the teeth is the main goal, and the few welds that it endures all serve to stretch it out.

All three bars welded up without much trouble, and with another bar of wrought to serve as the spine, the three pieces were ready to be welded for the final pattern.

Above, you can see another hint of teeth in the spine bar. This was the piece we tried to make for the teeth on the edge, but because of the deviation and twisting of the wrought as the teeth pressed into it, it was unable to be used for that. So, because it was already folded hearth steel, we just forged it back on itself to square.

And here is the final welding pass on the blade.

Post weld, everything looked solid. Because of the relative preciousness of material, we forged a stub tang and welded on a piece of wrought.


While forging the last bit of wrought, a quick spark test/trimming the tip showed that there was still a good amount of carbon left in the steel in spite of so many welding/folding/forging cycles.

A little more forging, and this is what the rough billet looked like.

An etch of the cutoff from the tip provides a good look at what the steel is doing inside. It's a little difficult to tell because of the tack welds showing in places, being so near the end. However, the twist bars are all very solidly welded and the weld line of the tooth is very clean.

For the tang, we jump welded the wrought to the body with a single solid blow with a sledge while the other two held it in place.
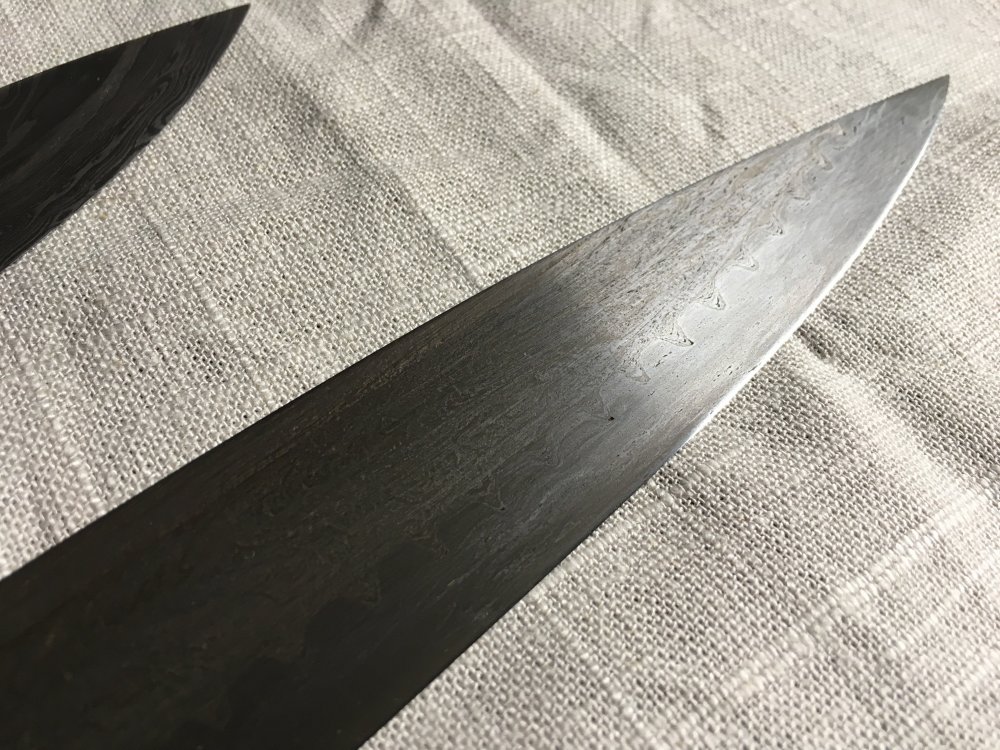

After the final bit of forging, Emiliano did a fantastic job profiling the shape and taper of the point to match the width of the steel. The final tooth geometry is almost spot on with the original, although it did stretch out just a hair. Most striking is perhaps the definition of the grain in both the teeth and the edge bar. The pattern flows beautifully and in a way very suggestive of the originals. I believe this will be a good starting point for further examination, we learned a considerable amount in the process.