
The first order of business is to lay out the joint, which begins by finding the centreline of the body's head and marking it perfectly square. By fitting the back onto the sides, the alignment is fixed with what it will be once the neck is attached, removing that source of error. To hold the neck in place, it will be in essence a single sliding dovetail that extends between 60~70% the height of the body. Instead of measuring the entire length, it stops short to give strength where the neck can bear the tension without compromising the thinner, weaker heel. At the same time, this allows the neck to blend more pleasingly into the body without stopping somewhere short of the back.

Once the width of the neck is transcribed and centred on the body, the lines are extended down, perpendicular to the top. This is the important part. It does not matter as much if it is square to the back, as the back is independent of the fretboard alignment. However, if it is misaligned with the top, there may be issues with the strings colliding with the body as it is played.

This portion of the body's head is removed to give a flat, square surface against which the neck can mate. I considered leaving it rounded, but the layout was significantly more complicated, and it would all be removed later anyway when cutting the slot to accept the neck.

Also, there were a few slight problems leftover from joining the sides with the head block that were eliminated by removing this piece as waste before attempting to further change its shape.

Based on how much of the head block is solid (in the initial shaping I hollowed out a groove on the inside to reduce its weight and potentially enhance the acoustics) I scribed a line for the depth of the joint on the neck. This will be how deep the dovetail pin and tail will be.

Using the angle gauge, careful to keep it set until all four lines were marked, I began by marking the heel of the neck. Because the neck material is more important than the block in the body, I cut this one first. The slot can be more easily changed in dimension to accept the neck than risking making an irrecoverable mistake on the more visible, structural neck.

As with all the previous joinery, I used that scribed line to establish a knife wall via chisels. The vertical side is on the side of the cut which will be preserved, in this case the larger portion of the neck.

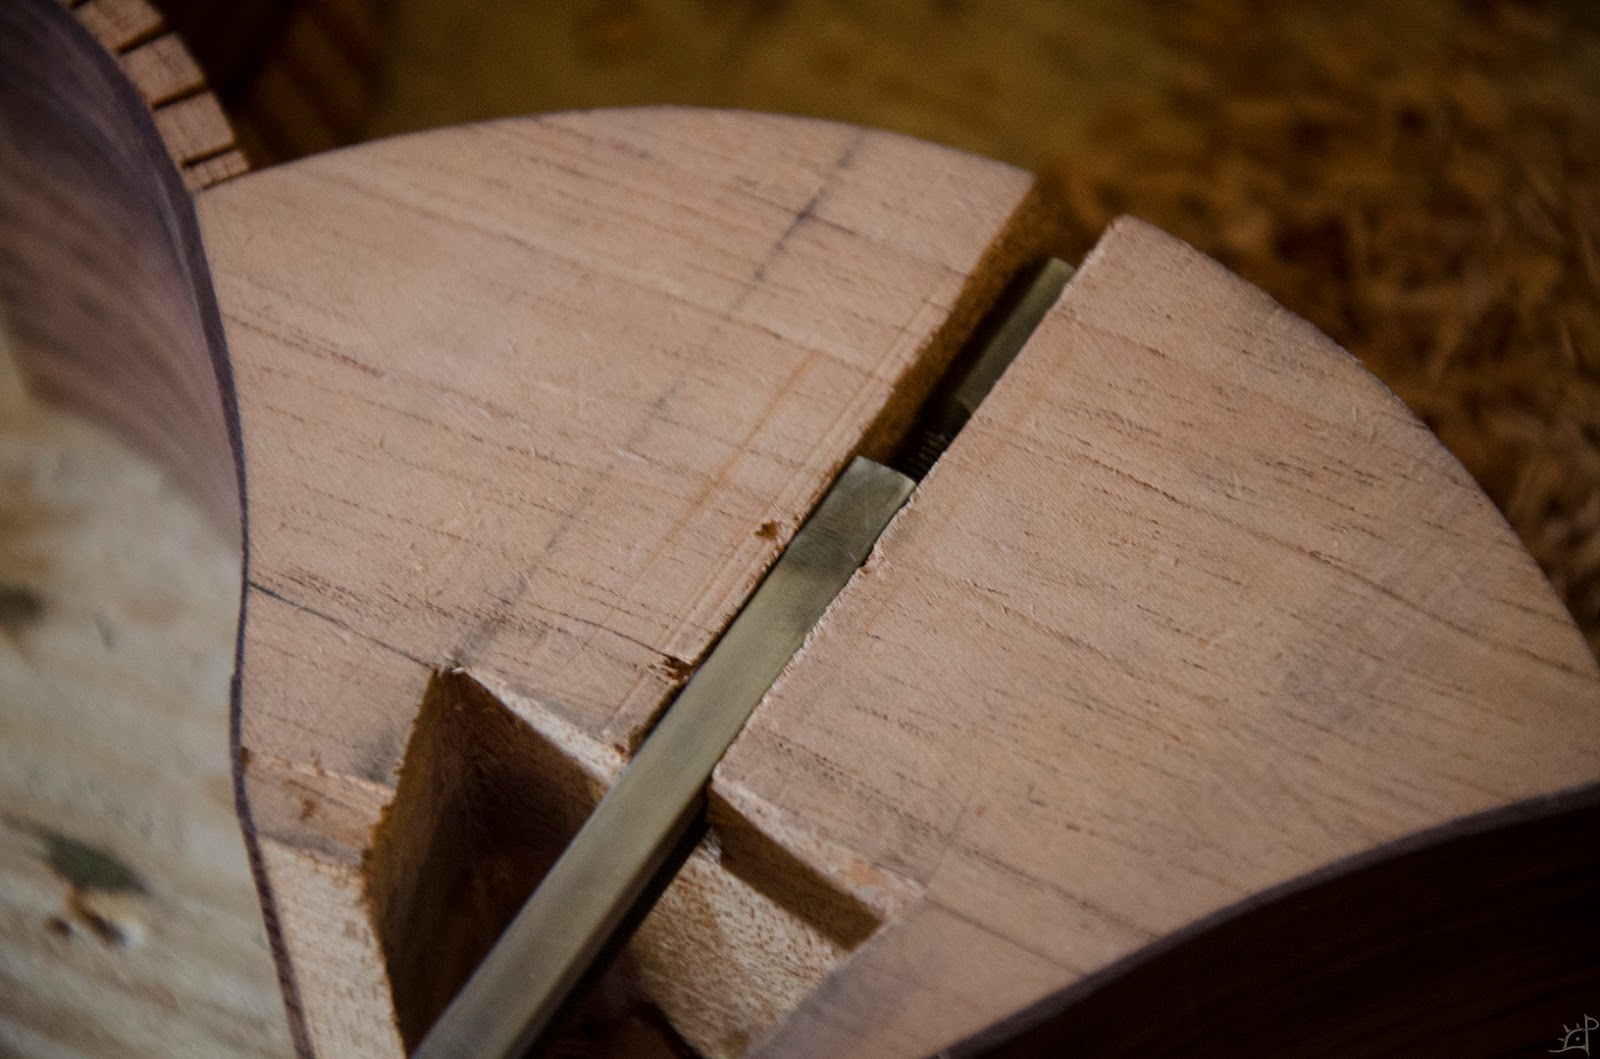
Before any cuts were made with the saw, the outline of the shape is clearly visible. With the established grooves, the saw blade is more easily and predictably guided towards the necessary precision.

After making the four cuts, the first half is nearly complete. With slight cleanup with chisels, the sides are made as parallel and flat as possible.

Here, I measured the height of the neck as relates to the body. I did not account for the thickness of the top in this measurement, and corrected for it later. Ideally, I should have left it long and cut only after the top and back were attached.

Now, I began making estimations for far to extend the joint into the body. The portion above the line (which later shifted down a bit) will be removed to make a 'corner' that leaves the rounded portion in back intact.

Same as before, the lines for the cut are scribed and established with a chisel.

Due to the tension of the strings, the neck will be torqued against the body, and having this shelf to press against the neck block just below the neutral plane will hopefully give it a bit of extra strength. Also, having that hard limit as to how far the neck can slide down into the body will allow me to more repeatably insert and remove it while adjusting the joint.

With the neck side of the joint finished, I returned to the body. Same as always, the lines are laid and scribed, but this time a little on the short side so I can expand the slot slowly until the neck fits perfectly. Unfortunately, the Spanish cedar has an extreme tendency to splinter, but fortunately this will all be covered, so the aesthetics of this part do not much matte as long as the joint surfaces are relatively clean.

Every now and again I tested the fit, ensuring that it was not becoming loose in places it already fit. I added a very slight taper to the neck, so when it is 99% of the way fitted with the body, the last 1% will be forced down to make the joint immovable.

Several trials and errors later, the joint is finished.

At this point, I had to ensure that the plane of the neck is coplanar with the face of the body. If not, there will be problems with the strings resonating against one or the other, making it effectively useless.

Another view of the joint. Overall, it is tight and solid and does not move in the slightest when handled, but there are a few cosmetic problems which I will address in a later post.

Returning the back to the sides and restoring the shape to its final position, I measured a final time to confirm that the neck is in line with the body. Using a jointed board as a long straight edge, everything checks out to the degree of accuracy to which I am able to measure in this state.

In order for the neck to actually join with the body, the slot for the truss rod needs to extend into the neck block. Now that the two are (temporarily) attached, extending the lines of the slot is easy. My straight edge happens to be the exact width of the groove, so I was able to drop one end into the slot and mark out the extension of the lines.

From cutting the channel in the neck, I learned that the router plane needs a fairly established slot to follow before it can begin routing. After scribing lines, I began with the chisel.

Setting the plane as shallow as it can cut, I began the satisfying process of deepening the groove. The router plane is, now after having used it a number of times, one of my favourite tools in the shop.
In a perfect world, the only bit of the truss rod extending beyond the end of the neck would be the smaller portion that accepts the wrench, but this was as close to the length of my fretboard configuration as I could find. In spite of the length appearing seemingly perfect, those few centimetres that lie in the neck block will act as a lever to push the neck out from the body. If everything is solidly constructed, everything should be fine.

Another test fit with the neck in place to ensure that the alignment is acceptable before attaching the fretboard over the truss rod. For this post, that is the remainder of the neck related work.

Next up is actually attaching the body to the back. With all the work that has gone in so far, this should have been a fairly straight forward and easy process. With the sides traced onto the back, I had a mark to cut along.

Making use of the coping saw I trimmed off the excess side material, leaving a few millimetres for tearout and the possibility that it would shift a hair when the sides are under clamping pressure.

For the first time, the back actually looks like it belongs with the rest of the project. This was an exciting time, finally realizing the product of all the time taken to reach this point. There is, however, still a long way to go before the end.

And of course, there was a minor catastrophe. Unable to use clamps to hold down the sides while the glue dried, I was forced to use a variety of weights. One of them, somewhere around 45 pounds, slipped and crushed a portion of the sides. For a long wile I had no idea how to go about repairing the damage, which looked worse every time I considered it another time. Part of me was hopeful that the perfling would be wide enough to entirely cover it, but it would not even come close.

In the end, I sorted through the pile of rosewood that I had just cut off from the back and found a piece that matched the grain as closely as I could find. Because I had no time or desire to try bending such a small piece to perfectly match the curves, I instead glued it to another scrap so it was thick enough to encompass the entire bend of the section to replace.

Unceremoniously glued together, I let the section dry and carefully cut out the damaged portion of the sides.

Perfectly mating three sides was difficult and infuriating. In the end, I cut a slight taper on the two vertical edges of the hole in the sides, then reverse tapered the replacement block so it fit like a wedge. That left only the bottom edge and matching the angles. Eventually, it fit well enough on the bottom half that I left it alone, as the top would be covered by the perfling.

Clamping the repair in place was almost as bad as cutting it. There was no good way to secure it with even pressure, the sides being flexible enough to take it off of one corner or another, and it was small enough that there was no room for additional clamps.

Finally, it was done. Sanding off the corners to match the curve helped blend it together. Of course, the overhang on the top was also later removed, but that will be covered in the next post when I join the top to the body.
No comments:
Post a Comment