
Seemingly every direction in bookbinding implies that, unless using screws or spiral bindings, the folios (smaller groups of pages within the larger binding) begin a pages folded a number of times then trimmed on three edges, so the spine remains folded paper. It can be one page folded in half, or larger sheets in quarters or eighths or into however many pages preferred. The reason for doing this is to make sewing the spine easier, but when printing through conventional methods this becomes significantly more difficult. Even printing four pages onto one standard size sheet requires a great deal of planning and progressive margin adjustment for thicker volumes. To counteract this, I decided not to fold anything at all and simply to cut a letter size page in half to form two 5,5x 8,5 sheets which will then be printed front and back.

Setting a guide on a guillotine style paper cutter allows quick and fairly precise work. Enough to be accurate within 1/32", which is more than sufficient for printing. Any unevenness in the binding will be more than this tolerance, and will be cleaned after the folios are bound into the final size volume.

After printing all the pages (or, as most hand bound books in this era are used for forward-produced content, blank pages), a stack of around 25 are taken together and clamped near the spine edge with as accurate an alignment as possible, leaving just over ,25" space between the edge of the paper and the boards. After experimenting with various positions, I found this best to achieve a tight binding while still allowing space to avoid the pages from becoming glued to the boards.

I used a standard PVA glue, and although there are various recipes out there for traditional flour glues and commercially available bookbinding-specific PVA glues, I found that Titebond III (wood glue) does the job. While clamped, I ran a thin bead of glue down the edge of the spine and pressed it between the pages with a finger, using the excess to cover the corner and spread it onto the face of the outer two pages as slightly visible in the above picture. This ensures that the outermost pages are held to the stack, a problem I had when I did not wipe the glue over the edges of the spine. While this is only a temporary means of binding the folios, better secure now than dealing with it later.

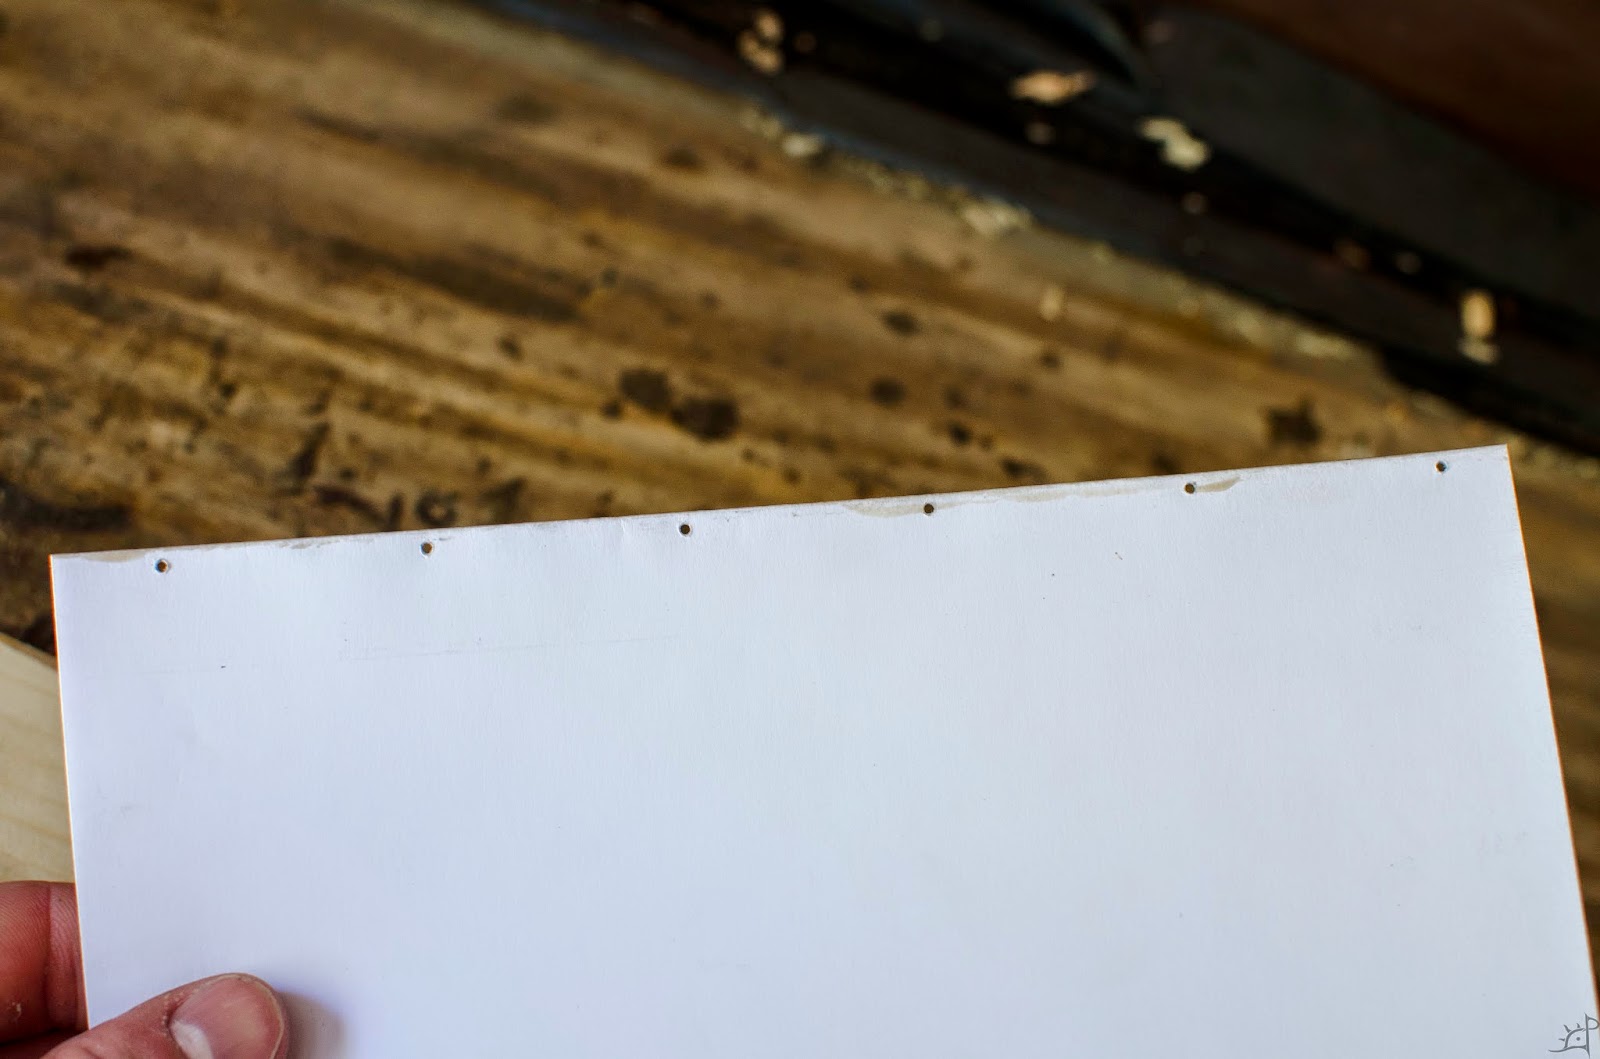
To make quick work of sewing, I made a steel guide for the drill which will be clamped over the folios. Traditional awls are used to punch through the spine, which is folded, but since that does not work here, I will be going through each sheet from the top down instead of inside to out. Six sets of holes spaced between both ends (skewed towards the ends with one in the centre) are plenty for the 8,5" length.

Aligned with one end on the bottom of the page, the edge along the spine, the guide creates very quick and consistent work of the 13 folios in this project. I used the smallest bit in the standard set of drillbits I had, which I believe is 1/16", to create holes slightly larger than the needle I will be using later.

In order to bind the folios, I used a waxed cotton thread and one needle for each set of holes. I thought about using just the one needle but realized that the tightness of the binding will be much greater if they are all done at the same time, and the folios will not be manhandled as much in the process.

To start, I tied a knot around each hole in the topmost folio (pages 0~50) and fed the excess through to the next knot to keep things tidy. This is something I changed after completely binding the folios to remove the ridge left behind. It should also be noted that the knots do not need to be overly tight, and depending on how close the holes are to the edge of the page, it may sever the paper.

This is where I start inventing things. Typically a strip of cloth is used to sew to the folios, but the orientation of holes is not suited for that. So I start looping the threads through two folios at a time, then pull tight before moving to the next.

Using this configuration of knots leaves a very strong binding that minimizes the chance of tearing through the holes.

In effect, two folios are bound together with the loops at a time, and the slack of the thread is carefully removed to hold the duofolios in alignment. Then the needles thread through the next pair until they are all bound together.

With the stack bound, I considered stopping here, but then realized that the pairs of folios are connected with only the one length of thread. In the above photo you can see the slight misalignment of the thread where there are 'corners' to the stitching.

Bringing these together with an overhand knot allows for increased rigidity in the spine and security in the binding. Working up the seam, I tie a knot between each side of the adjoining loops, drawing those 'corners' together.

When I was about half way up each seam, I brought down the loose end from the very first knot and bound it into the the rest of the stitches. This gives a (in my opinion) cleaner finish to the binding and also pulls the topmost knot down into the spine rather than having it stand proud of the top folio.

Finally, I added another layer of glue between the stitching as a last measure in holding it all together. Be careful not to cover the threads, however, as those will be used later as an anchor point for the cloth and mull which holds the pages to the cover.
To be continued...
No comments:
Post a Comment