It has been quite a while since I have posted anything here about what I have been making, and unfortunately the going has been scarce for the last few months. Between work and moving to a place that doesn't have any shop space, I have only been able to take on a few odd projects.
Inspired by a trip I took a few months back to meet some friends in Michigan, I decided I would try my hand at making a leather waterskin. Traditionally, they were made with the stomachs of livestock, but I figured leather would be easier to find. Having had no idea of what this would take to complete, or how to go about doing it, I just dove right in and let the project develop on its own.

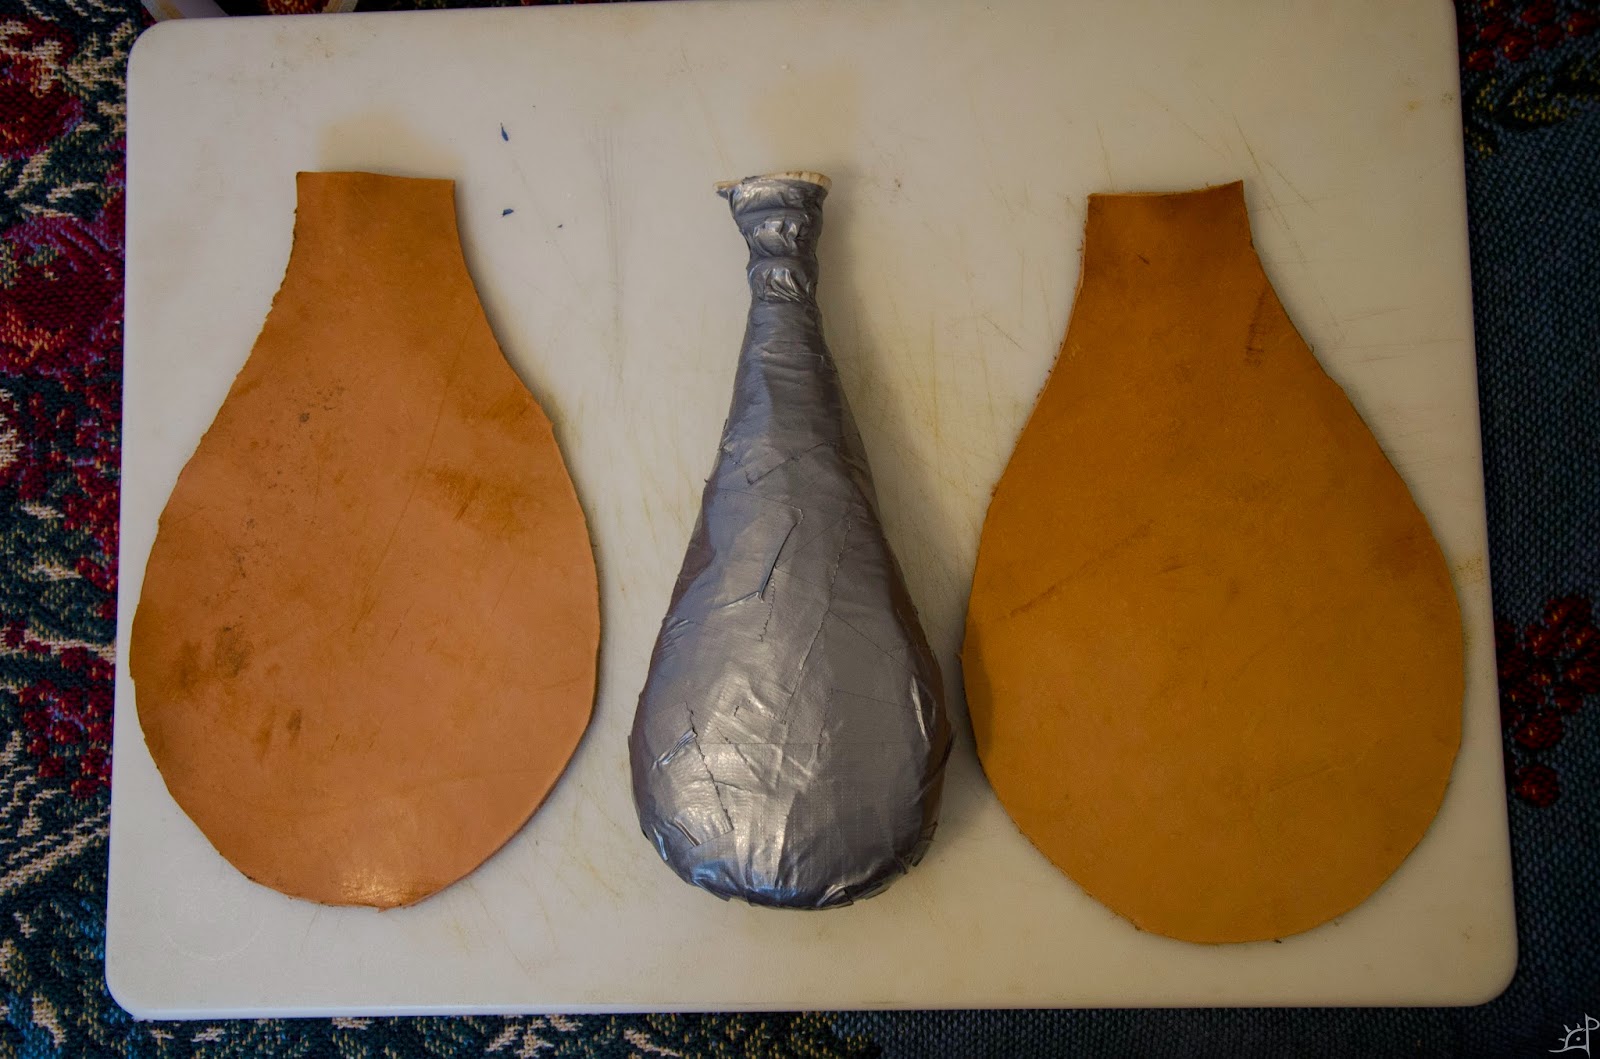
First, I drew the pattern and cut it out. Nothing too special or measured. Because of leather's quality of formability when wet, I would take flat pieces of leather and stretch them over a form.

These two pieces will later be sewn together. The edges do not matter, as they will be trimmed again after fitting them together. If I were to do this again, I would do everything after this step differently. I will explain why later.

For a form, I used recycling packed together and covered with duct tape. Making it smooth and solid was difficult, but in the end it worked out alright. On the edges, I left enough of a gap for the leather halves to come around and meet with about ~1.5cm flange. That is where the stitches will go. If there is not enough room, that is fine, as the leather will still be pliable before sewing and can be fixed then.

Before forming the leather, I began work on the pour spout. I was taken with the idea (at the time when I conceived the project) to use antler as a collar. I had a piece lying around that was perfect size and shape. Keeping the natural flute for the top seemed to have a nice flow to it that would secure the leather after sewing.

In order to help the antler seal with the leather, I cut around three rings that would grip the leather. The bottom most, I realized later, would need to have an inverted funnel leading to the pour hole so water would not become trapped there when held upside down. Similarly, it is important to have the bottommost ring at the very bottom of the throat, as the leather will tighten around it and if done improperly, will have the same problem. Imagine putting a straw in a cup and turning it over. Water will only drain out until it reaches the bottom of the straw, even if there is still a considerable amount of water inside. Same principle here.
After cutting around the rings, I affixed the antler to the form. This ensures that the wet formed leather will have the right shape around the antler in the right place.

Soaking the leather in water for a few minutes to make it thoroughly wet, then drying slightly with a paper towel, makes it extremely pliable. Aligning the two halves and clamping them down as tightly as possible stretches the leather over the form. It should be noted that the clamps will mark the leather, so I used scraps of leather to protect the piece from the bite of the clamps.

Sitting for a few days to dry completely, flipping it over occasionally to let the underside have some air, the two pieces will keep their shape.

For decoration, I cut two pieces to sew over the skin. I later abandoned the larger ones for ease of sewing, but kept the top, smaller ones for use holding a leather cord.

Using a star wheel to mark the holes, I took a flattened nail to punch through. I thought of using an awl, but the holes were too large. Here, it is critical that the holes are as small as possible. The larger they are, the harder they are to seal later. And with a few hundred, even one oversized hole makes a difference.

Instead of using sinew, I opted for a nylon thread for its strength and better handling of boiling water (later step). This was by far the most time consuming part. Aligning the first set of holes was tedious and painful on the fingers. Two passes on each row of holes for a complete stitch took about 5 hours.

Before finishing the first round of stitching, I went back to the spout. I drilled a hole through it for the water to run through as well as shaping the antler a little more. Above, it is still covered in residue from the tape, but that was all removed.

With the antler in place and all the stitching done, it is time to boil the leather. Boiling makes the lather tighten, growing in thickness but pulling tighter in every other direction. Boiling plasticises the fibres in the leather, making it rigid and more waterproof. The length of the submersion will dictate how much it shrinks and how hard it becomes. This technique was done to make armour for centuries. One warning, however, is that if you over boil it, the leather will become extremely fragile and crack apart.
Depending on the leather and altitude and a number of other things, it can take anywhere between 20 seconds and a minute to achieve the rigidity you are looking for (probably varies for you too). This is not something that usually comes out right the first time, so I would recommend taking a scrap piece of leather from the same hide as the pieces for the waterskin and practising on them first. For best results, either pour the water over the leather as evenly as possible or find something large enough to fully submerge it.
A third point about boiling. Boiling involves water. Water makes leather pliable. It will begin to deflate as you boil it, making this extremely difficult to do if you try to make a waterskin this way. I had to continuously inflate the skin as steam tried to pour out the antler spout.
***If I were to do this again, I would cut the leather, sew it flat, then soak it in water to make it flexible. Instead of a rigid form, I would fill the skin with sand and work it to the shape I wanted before boiling. While boiling, I would leave the sand inside so it would not deform. After it becomes rigid, I would let it dry and pour out the sand.***

To seal the leather and the seams, I used a copious amount of beeswax. I did not have an oven at the time, so I had to use a campfire to warm it first. For the wax to be absorbed by the leather, the leather needs to be warm. I would set an oven to around 115(c)/240(f) and leave it in there for a little while (maybe with sand still inside it if you went that route). When it is hot and your supply of wax melted, (remove the sand and clean as much as possible) pour the wax into the skin. Constant rotation will help the wax cover everything inside. This may take several attempts, but it is the most important step to the process to ensure that the entire inside is sealed, especially the seams. I would continue to pour in wax and mix around, blowing air into the spout, until wax no longer comes out of the seams.
Allowing to cool slowly is best, and when the inside is sealed, I brushed a coat of wax over the outside too. That helps protect it from the elements and increases its longevity.
The only thing that remains now is to find something to use as a stopper. A whittled twig would do nicely, or maybe a small cork if you could find one that fits.

All said and done, it works, but I would not have gone about it the way I did knowing what I do now. None the less, it was a fun project and now I have a traditional waterskin.
Cheers!
No comments:
Post a Comment