For my greensand mixture, I used three things (in addition to water). First, and most obvious, is sand. I gathered mine from a beach a year or so back with some measure of foresight when I was in North Carolina. It is a relatively fine sand, the finer the better until you reach the consistency of flour (ask me how I know...). This can be found as playsand from most hardware stores, but needs to be sifted of all the coarse grains. Fine weave screens work well for this. Second is silica sand. This is not necessary if you cannot find it, which as I understand can be laborious and expensive, especially in small quantities. I believe you can find this at pottery suppliers or speciality art stores, but I got mine from a friend in the arts business. The silica sand I have is extremely fine (you don't want to breathe in the dust from this stuff). Finally, southern bentonite clay. This is what allows the sand to stay together and take a fine pattern from whatever you are casting. I ordered mine from a supplier online a while back, just enough to fill a flatrate shipping box. It was not too expensive if I remember correctly. Another place you can find it, so I have heard, is by grinding up certain types of cat litter.
All the recipes I have seen for greensand measure the quantities by weight, but since I did not have a scale, I did it by volume. It took some adjusting before getting right, so here is what I used-
5 cups fine sand
3/4 cups bentonite clay
1/2 cup fine silica sand
Water to taste

First I put the beach sand in my mixing tray. The larger the tray the easier this will be.

On top of that goes the silica sand (or bentonite clay, order does not matter)

And finally the bentonite clay. Now it is extremely important that you thoroughly mix the three things (or two if you do not have silica sand). As even as possible will yield the best result. The bentonite clay is what really absorbs the water, and if it is not mixed well there will be dry pockets and clumps. No good.

Next is the most important part to get right, adding the water. The fist time I tried this, it was a disaster. I added water from a measuring cup and it was near impossible to even out in the mixture. So this time, I used the spray function of an iron. A squirt bottle would be just as good (ideal) but I did not have one lying around and this was the best I could do. A fine, even misting to dampen the surface of the sand is all you need. GO SLOW! It is very easy to over saturate the mixture, and once that happens it is extremely difficult and tedious to fix. Once the surface of the sand is dampened, mix it around until the entire body of the sand is uniform again. It may be necessary to cut the mixture and fold it over itself.
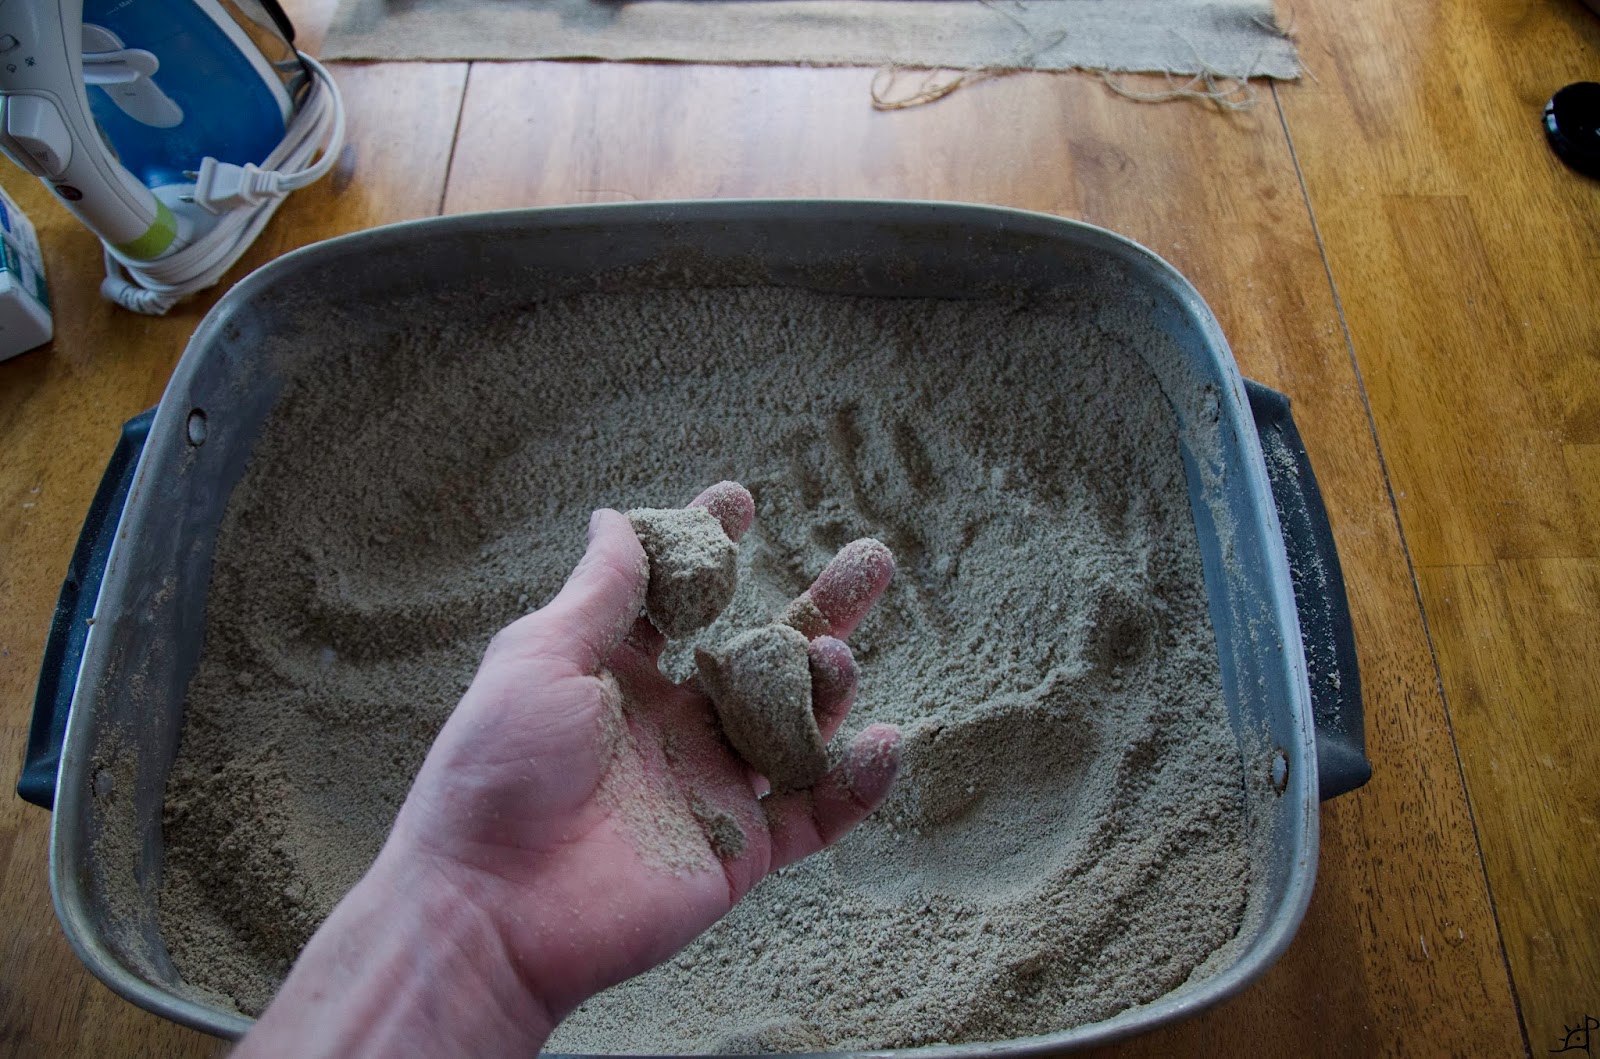
Repeat the process of dampening and mixing until you can take the sand in your hand and clump it into a ball. The cluster should retain its shape while not leaving sand stuck all over your fingers (it is on mine because I did not dust them off after mixing). The cluster should also not crumble when you break it. As shown above, it should break cleanly and not disintegrate. You may need to dampen the sand again if you store it for a long period of time, but this mixture should keep for a very long time in a sealed bag or container.
That's it! Nothing fancy or special about it, and it can be made in about five minutes once you have your ratios of ingredients figured out for your own use and preference.
More later on how to use it.
No comments:
Post a Comment