Pages

Friday, December 22, 2017

Heaven's Reach

or, The Ha'ikū Stairs


It seems like an incredibly long time ago now that I stood at the top of the fabled 'Stairway to Heaven' nearly three months past. As with all things, the experience comes and goes and the pictures superpose memory.


In the early hours of dawn, we set out to catch sunrise at the summit. Arguably, we took an admirable go about it but ultimately fell short by an hour or two. Not knowing the way or even where to begin, the first moments echoed everything we saw on the internet regarding the ascent. From the north, the stairs themselves are very illegal due to the state of decay that grew upon the since their use in World War II as a pathway to a secret radio network. From the south, the trail itself is not necessarily illegal, depending on how you go about it. At nearly three in the morning, we thought it would be a safe venture. To our education, there is no end to the tenacity of disgruntled neighbours. Within less than five minutes of coming to the trailhead, we were joined by another pair of hikers and, even shorter thereafter, the police.


Sympathetic to our good nature and general disposition that must have been contrary to the other sorts of blokes who frequent the area for early morning adventures, they seemed relieved that they would not have to detain anyone. Even better, a minute after they arrived, they jumped back into their cars and took off to the background noise of a radio squelching someone's stolen vehicle. As soon as that, they were gone (and so were we).


The trial itself snaked its way across the valley between ridgelines for a handful of miles before taking a great leap upward and through the bristling slopes of O'ahu. That it was still dark served as a testament of how laborious the process was; stars themselves over the edge of the horizon seemed to sweat in the fall of early dawn. That mist which lingers in all cool places which know a striking heat to the day blanketed the cloudforest and, as we scrambled our way higher, grew subsequently thinner.


After a time, the first light of dawn broke over the eastern mountains and cascaded the world in a brilliantly green light. The light, it turns out, of billions of living things drinking it in at the very first opportunity. Seeing the scale of the canyons and the lushness of the slopes in spite of their offensive steepness was breathtaking. Or maybe it was the general ascent. In either case, the shedding of night's veil was a welcome relief even though we knew we would not reach the tower in time for true sunrise.


Eventually, the old radio tower appeared on a distant peak. Another good mile or so of twisting, muddy trail lay between us and it yet the end was near. All along the upper pass, a series of precarious ropes dangled on the slick mud faces for hikers to climb. More often than not, the top of the rope was hidden around a bend or so far overhead that it disappeared in the sheerness of the slope. More often than not, it looked like a better idea to not use it. Until trying. Thankfully, they all held to their purpose and everyone returned safely.


It was around this point in the hike that we realised the severity of how much the islanders did not want anyone climbing the stairs themselves. Out of the fog, we heard the sound of a helicopter on the north side of the trail which holds the entire length of the stairs. As it turns out, they were surveying the stairs for anyone who managed to sneak past the security stationed everywhere withing creeping distance of the entrance.


In the end we were, as some old nefarious vandal noted, 'On Top'. The tower itself was a neat combination of derelict history and waystation to rest. A sizeable congregation of hikers and campers (who slept inside it) waited there for the morning and so we joined their ranks and looked down over the stairs. A quarter mile down or so held the iconic scenery where the stairs descend at a frighteningly steep angle and the rising mist obscures the world below.


From above, it looks almost like a miniature model but in reality plummets a few thousands of feet down to the lowlands and the ocean.


Down the back side lay a collection of ruins which once housed other communications stations and outbuildings for the radio tower. Along the stairs in the brush, a pair of thick cables runs parallel to the ridgeline where the nation's most secret of secrets once travelled. In a sense it is remarkable how simple and how resilient the way has become. While a good portion of it is in severe disrepair and wholly not recommended for casual travel, the nature of it is supremely interesting. When coupled with the views, I am considerably glad and fortunate to have walked a part of the stairs before they are either removed or some more serious effort is taken to prevent expeditioners from pursuing them.


And, of course, I was compelled to find the US Geodetic Survey marker at the summit, an old habit from my long days in the mountains in the east.

Happy trails!


Thursday, November 16, 2017

Across the Seas


16,000 endless leagues of open ocean pass beneath the keel, grey as slate and blue as glass, each one preserved in the same rhythmic imbalance of a crew without landfall in as many days as pass between two distant shores. Were it not for the changing of the moon each night might pass undistinguished from the last and as easily forgotten. Hours stretch into weeks, and in the blink of an eye it seems a month has come and gone before the sun meets noon. And yet, to the eye of western civilization, it is all dreamlike and distorted through a lens unappreciated through modern perspective.

Pago Pago Harbour, American Samoa
Nations take to the seas, their population more heavily laden on the decks of trawlers than the wharf from where they hail. To live for years at a time aboard a vessel no longer than a hundred yards, never mooring and never returning until the voyage is at an end, it would be to another mariner unfathomable. And yet that is a way of life. From the early hours of manhood until the seas harbor safety no more, there is a people who become strangers to land.

Port Villa, Vanuatu

Entrance to Port Villa, Vanuatu

Port Villa Harbour
For a day or three spanned by months upon months on either side, the Pacific's fishermen know only what touches the ports. Shirts on the backs of the deck hands once belonging to defeated sports champions and collapsed cultural icons, modern phones out of context from use, food for the bait of the catch and little else that cannot fit inside a footlocker is all that there is to sustain a life at sea. Perched on the tops of some, there stand greenhouses to grow fresh vegetables and herbs where otherwise there would be none. A pack of anxious dogs lie in a litter while their mother barks at foreign scent. Freezers to store the catch with fans and frost so blisteringly cold that a person would be frozen through in a quarter hour. Hands and feet calloused by working lines and scarred from the barbs and hooks that pass between them. There is a sovereignty in the life of the high seas no longer concerned or consumed by modern society.

Magnetic Island, Australia

Townsville, Australia
When the sun passes behind the horizon, an unbroken line of blue stretches across the sky 800 miles from the nearest rock. On those rare and hypnotizing nights where the moon has taken instead to the daylight, all manner of stars blaze across that midnight abyss. More lights appear as the eye drinks in the night than the busiest cities, each shimmering with their own hidden mysteries. Constellations that guided ancient mariners and storytellers return to the wanderer, cleft by the haze of the Milky Way. There it hangs in the sky and spans from one end of the horizon overhead and back down again to meet the earth. Even in the darkest places of the land it has never been so clear. Tendrils of its enormity fan out from the core, slight tints of colour painting the otherwise two tone heavens.

O'Ahu, Hawai'i
And again when daylight comes, lingering cloud cover broken in spectacular hues and crepuscular rays, only to reveal those rolling waves of blue and grey. When those rare days come between and land falls on the distant shore, it is with the awe of a world unchanged. So many thousands of islands and cultures and peoples lie on the edge of the modern world's chart that each one bears that same ancient wonder of exploration and mystery. And when the mountains and jungles and reefs drift into view, suddenly all that compels man to venture across the seas becomes understood.

Sunday, November 5, 2017

Lost In Motion

It is from where we have come and to where we are going which defines us. Each step in the walk of life contributes unknown and unseen factors towards the accompaniment of who we are, together compiled into a singularity of who we are. 


In the strange and mystical places of the world there lie just about us so many lands and cultures that a lifetime might elapse and it is still one alone which we are trying to understand. To foreign shores and distant reign the wandering road of life seeks to bring us a glimpse into the worlds we have never known. In a sense, each day spent in wander is like the charting of a land whose boundaries have never been placed on the map. Indeed, the world is only as small as we permit, and the act of a solitary step is alone the first unto realising the unknown.


As the winds take me towards places I might have never known to live across the seas, I have struggled with a way of holding them all to the same perspective and hold in memory. Photographs and film are a window to capture those lands, but lie secluded and disentwined. To each they serve their own end, alone and worlds apart. And so, like those explorers so many generations before me, I have begun the charge of building the world not as it is, but as it is known. Cities and roadways and the drive for seeing strange and wonderful things are what build our understanding of the world; those places we live bearing the most distinction as a monument to our time there. Whether to a single country or a patchwork of all those yet to pass beneath my feet, it is the map of the world and its people that slowly builds colour and shape and perspective, and until those starcast nights and churning seas and howling winds and footpaths connected to the lands of civilization only by the leagues between, I will carry on to see the world as the wayfaerer lives: Lost in motion.


Sunday, July 16, 2017

Forging a Double Bit Axe


In the lofty pursuit of forging all the tools I will eventually need to timber frame a workshop, I have worked my way into the variety of axes. Starting with the small ones, this time I made a double bit axe. More of a proof of concept and to experiment with dimensions, it won't be doing much of the heavy lifting but is designed for light trimming and the like.


The size of the stock is 5"x2"x,75" mild steel, nothing special. The other axes I have made were done using the fold/wrap method where the poll is forged out of the middle of the piece and the edge is made from the two ends. This time, I slit an eye in the middle and the ends will become two edges instead of one.


All the tooling I used for this I made in the shop over the last few months. From left to right, there's a hot cut hardie, centre punch, hot cut chisel, small drift, large drift, hot cut (without the handle) and a pair of double calipers. On top is the pair of hammer eye tongs. These are great for this, and having only recently finished them 8 months after forging the two halves, I am incredibly glad I did. 


First step is to mark the centre of the billet. 2,5" in from the ends, I marked both sides. This is because slitting from both sides separately and meeting in the middle is generally cleaner and prevents one side from getting too thin if the entry is off kilter.


With the hot cut handled, it's onto slitting the eye. Flipping the piece around (or the hot cut) helps keep it all centred. I took the entire first heat to setting the line properly in the centre of the billet and across the dot I marked earlier. The setup is the most important part, as doing it off angle or off centre will be difficult to correct as the eye opens. If it is at an angle, it will tend to stay at an angle until either you reach the other side or it comes out the face of the billet.


Here it is with both sides slit. Were I to make the hot cut again, I would round the edges a little and make it more oval rather than rectangle so there are no sharp corners on the inside of the eye. This width of steel is on the cusp of being too thin for this size of a hot cut, and as a result, a small tear formed in one of the corners. Nothing catastrophic, but it would have been prevented with rounded corners on the hot cut.


Next up is drifting it open to size. By hammering the drift down into the eye from either side, then forging on the cheeks, it spreads out and widens. Do not use the drift by simply forcing it down through the eye and stretching it to shape that way, it will rip the steel somewhere with it being this thin. 


After moving through both sizes of drifts (you can get away with one or none depending on how you make the hot cut/punch/whatever), the eye is mostly done. Here, it is still thick because I want to do a few things to the rest of the axe body without distorting it unduly.


Before slitting the ends to weld bits into, I tapered the ends a tad. Looking back, it would have turned out better had I left it the original dimension, because the extra mass would have made welding in the bits easier and the subsequent spreading to shape easier.


To open the ends, I used the hot cut again, holding it on edge in the leg vice. I would have gone considerably deeper with the slit had I a better way of holding it or a second set of hands, but the limitation left it about half as deep as the bit of rasp I was using as the edge steel.


Cut on both ends, it looked something like this.


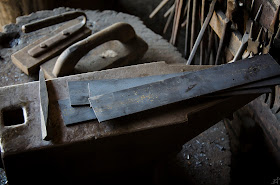
For the edge, I used the aforementioned rasp. Cut a little long to give room for error in alignment, it will be trimmed neatly after welding. I cut this one on the hardie hiding out in the shadow in the top right of the above. Having a narrow bodied hot cut is extremely useful for cutting thick stock (not this, but it also works great for thin stuff) that a butcher won't do without heavy distortion.


And, a fair bit hangs out. I could and probably should have forged it down to about half that width and doubled the length so I only had to use one piece, but the teeth of the rasp helps hold it in place while setting the weld.


Setting the edge hot locks the bit and the body together because the cold rasp's teeth bite into the hot steel of the body, which keeps it from sliding all about. 


A few careful heats to set the weld, then another few to shape it, the first side is set. Some of the excess is trimmed off here, but more sill go to clean up the edges.


Now comes the second. The easiest way to judge if the piece is welded with steel this thin is to let it cool. If shadows form anywhere when everything else around it stays hot, there is probably a weld flaw underneath. Even cooling indicates good welds, but obviously there can still be problems.


Back to the trusty hot cut, the excess is removed and it starts to look like the thing I am trying to make.


Unfortunately at this point I had to close the shop and didn't have the chance to take any more pictures, but a little more work was done on the eye, the last bit of profile forging, and a quick trip to the old hand crank grinder to true things up. I may end up going back and forging it a little thinner all around, but it feels good as it is...

Monday, May 29, 2017

Forged Chandelier: The Frame


Over the last few months, it has been incredibly difficult to get any time in the shop. Rather, to find any time anywhere to be productive making things. Throughout the weeks since I last posted anything, I have been working on designing and forging a chandelier. The ultimate design will have the piece detailed below hang from chain (which I will also make) and hold a collection of lights that cascade around the rim.


First off, the tools and techniques here are all period to the shop I am working out of, as I am here as a public demonstrator and educator to the 1850s era. To begin with, I forged the outer pieces of the rim. These ultimately determine the size of the chandelier, so I figured it would be best to do this before the cross piece in the centre.


Via hack saw, I cut the four pieces. Originally, I was going to have a solid rim with the ends lap welded together, then forged into round. This quickly turned into something else when I tried to figure out how to get the internals worked out.


To give it a little more flair and character, I added some swept corners to each of the ends. I intended them to be sharp corners, but I decided I liked the curves better (and were less work...). For the sake of repetition, as there are eight of them, I used the pair of double calipers I forged a while back. Half the fun of making things is using the tools you made to make them.


To that half inch mark, I drew out little tenons on each end of the four bars. These are what became the bent down points.


Which look like this. There are a lot of parts of this build that I was not able, for one reason or another, to document. To forge in these points, I held the tenons down over the face of the anvil and hammered them to a right angle with the long edge of the pieces. Then, clamping the lot in a post vice, upset the material back into the bar to get something resembling a corner on the far side. If I were to make it a sharp angle, I would have continued forging this way until the two lines came together, but I wanted the rounded corner on the inside and outside of the bend.


Considering the variation in the process, the result was remarkably uniform. Symmetry, I have come to realise, is my mortal enemy.


Next up is to make them round. No mysteries here. I just hammered them over the horn until I was satisfied.


Having them all bend slightly more than the 90 degrees of the arc they were cut to fit in results in a lobed sort of shape, which I liked more than a straight circle. It just seems a little more interesting.


Part II is to build the internal frame. At first I thought about some weird skewed thing that would not have any intersections, then having two layers where one side passes over the others, but in the end I decided to try out slitting and drifting each of the bars to pass through one another. It is a technique that I learned requires a bit of practise to get right.


This is the general layout of the bars, and where each of the intersections is, one of the bars will pass through the other. Blacksmiths are, as far as I have been able to reason, the only people who can put a 1" hole in a 1" bar and still have it all stay together.


This is where I wasn't able to take any photos again... But, to explain the process, I measured a distance from one end of each bar that was less than half, then marked it on all of them. Having a uniform distance here is critical to it working right. The distance off of the bar's centre determines how large the square in the middle is. The closer to centre, the smaller the square.

To actually make the holes, I took a chisel and slitted it to roughly the skewed length of the bar that passes through it. Then, I forged a drift with the tip that tapers only in one direction. This way, as it is hammered through the slit, it widens the hole in the right directions. It's really just a wedge that turns into a square at the end. Having the slit be wider than the width of the drift helps with not stretching out the cheeks of the hole you are making.


With all that out of the way, I set it out again to determine the next move. Attaching the outer rim to the cross went through a few design changes as well. Before I actually started any of this, I thought about using wedges to hold the outside pieces on to tenons sort of like in Japanese woodwork joinery, but I gave up on that almost immediately.


Instead, I decided to make regular tenons and forge them down like rivets. To make these, I used a guillotine tool for the shoulders, then followed it up with a hot rasp (after this picture was taken) to make it all square and aligned.


Making the square holes for the tenons to fit into was actually the easiest part of this ordeal. Because they were all slightly different, I made a tapered punch/drift that I eased into the size of the tenons. Because of that, it all fit together only one way, but that's fine.


Getting the thing to assemble was tricky. Once the first three rim pieces were on, the entire thing became more rigid, and since the sector length at the end of the tenons is a fair bit longer than it is at the shoulders, working that last piece into place took a bit of patience. This too also helped lock the inside frame into place. Due to the nature of its construction, the four bars can slide closer and farther apart until they are constrained in some way. Having the outside pieces there prevented it from moving about.


And there we have it! This bit is done for now, all eight rivets in place. Heating it in the forge was precarious at best, because the thing is large and awkward. I had to clamp it all in the post vice to hammer down the rivet heads, and even then the ones that were not yet affixed tended to fall off without any help getting them back on again.

Next time, I will forge the chain and hanging assembly, and maybe also just finish it with the wiring. Who knows? I guess we'll have to learn together.