With the folios bound and the spine prepared for affixment to the cover, the cover itself must be made. Modern books are usually bound with either cloth or imitation leather, but a more traditional take is real leather (sometimes from people!), so I opted for 1oz calf hide.
First, however, the bookboard needs to be cut so the amount of leather needed can be accurately sized and cut.
This particular hide has a slight variance in thickness on one end, but it is large enough to work around. Measuring and cutting bookboard for he front and back covers, along with another for the spine, I marked the dimensions to be 3/16" proud all the way around (3/8" longer total than the length and height of the pages). The backbone should not be any wider than the compressed thickness of the spine, which I regrettably overshot by a slight amount, realized when it was too late to trim down.
Positioned on the leather roughly where they will be bound, leave around a half inch of extra material on the entirety of the border. This will be folded over the edges of the bookboard, and those interior edges masked with paper.
With the outside of the animal on the outside of the book, the bookboard on the suede, another test placement marks where the backbone will be placed. Attaching this will be first. To ensure the greatest accuracy, I folded the leather and marked the exact centre, then aligned this with the middle of the backbone.
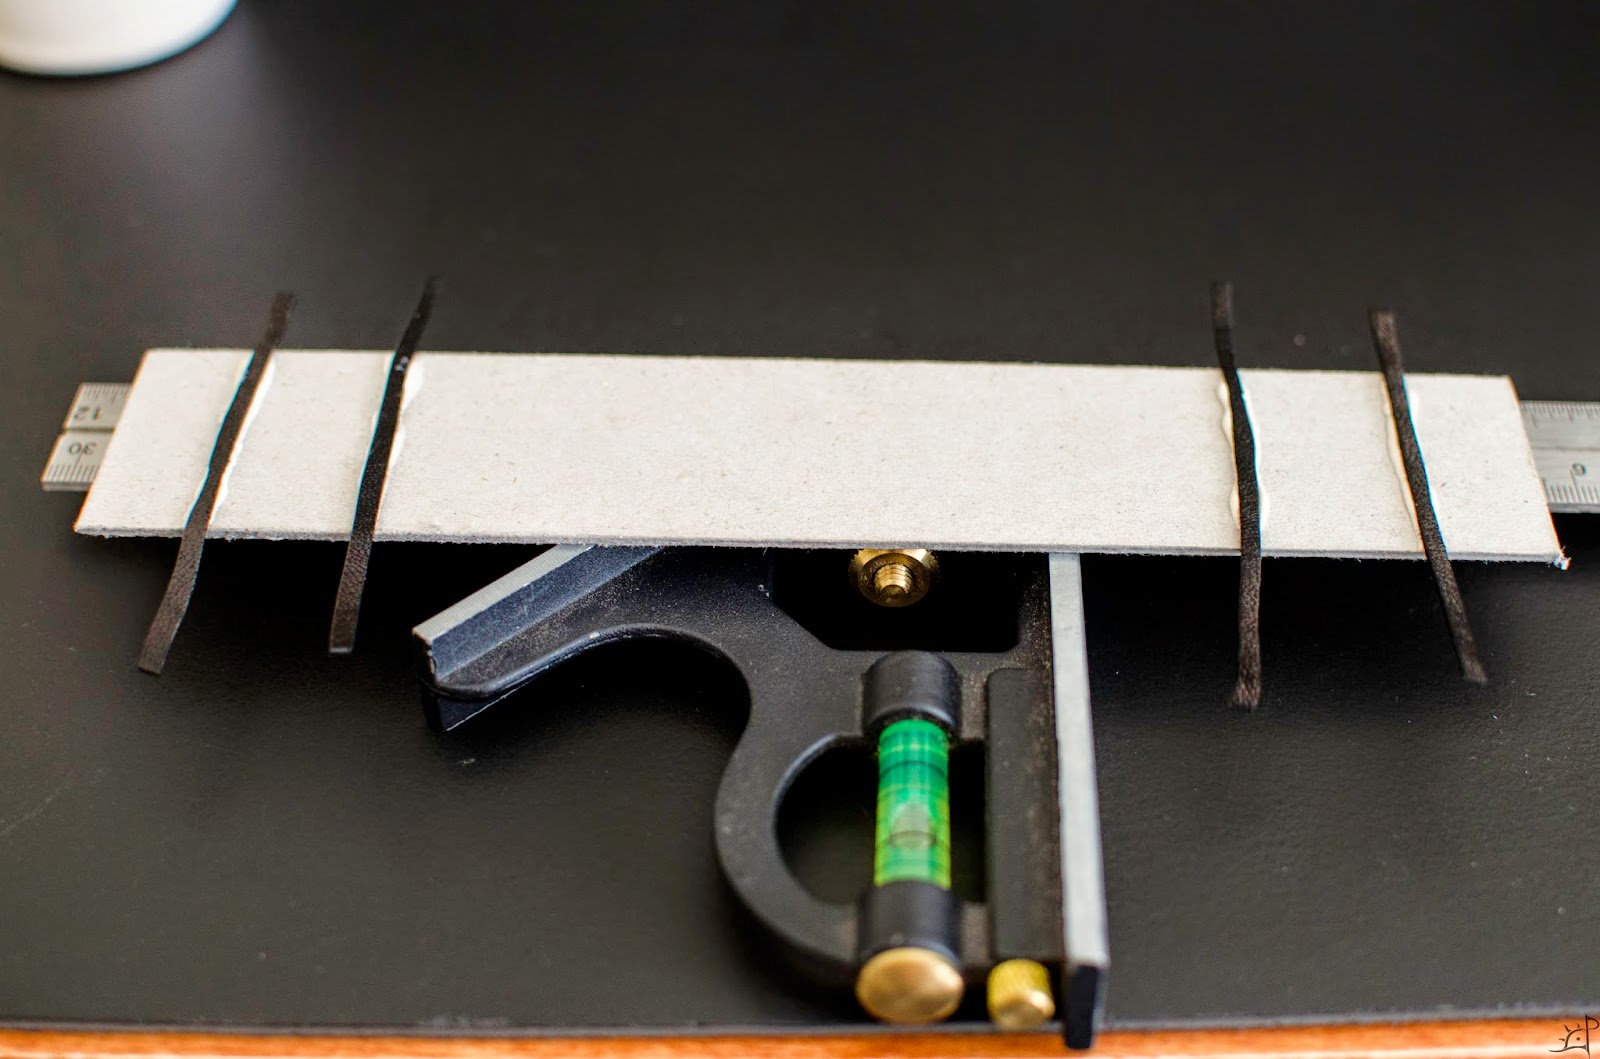
Instead of having a plain spine, I decided to ornament it with a pair of ribs on each end. Depending on the height of the book and the width of the spine will determine how they look, so I tried a few positions and settled on an inch spacing between the two, and the first one 3/4" down from the end.
When I trimmed the leather square, I had some bits left over from which I cut strips 1/8" wide. These will be used as risers for the leather, making the ribs stand proud of the backboard.
Saturated with the same PVA glue as the spine of the book, the leather strips were laid down on the backboard and pressed into place. It is important to leave some overhanging material to wrap around the edges of the bookboard so when the cover is attached, it does not leave corners (this way they are rounded and blend more easily).
Folded over the ends are glued down the same way. Not all of this material will be kept, but it is better to have too much than too little.
Here the backboard is positioned again for reference.
Final measurements are marked and the preparations for attaching it are made. Again, the PVA glue will be used here. I did a test on the leather-bookboard bond and it is plenty strong, although with excessive force the cardboard delaminates before the glue bond fails.
To bind the backboard to the leather, I needed about three days. Not because it is difficult, but because I did it in sections in order to establish the ridges. Without folding the edge over (leaving it hanging the half inch over the backboard), I applied glue to the 3/4" of space on the backboard between the end and the first rib. Then, with a scrap of bookboard, I clamped down with the edge of the scrap flush with the rib. This made a very clean line. Note that I did not put any glue on the rib itself yet. This allows to pull the leather tight over the ridge to prevent a loose binding.
Several hours later, the glue was set enough to remove the clamps. The excess that will be folded over is bent down so you can see the edges.
Six more repetitions of this produced the final binding of the backboard. One between each pair of ribs, one each on the inside of the inner ribs (with one more for the bulk of the space between them), and a final on the other end. Leaving the clamps off the edge of the scrap bookboard prevents having creases in the broad middle section. There, I used a piece of wood as a clamping block instead, again with the pressure near the middle. When doing the ribs, I clamped closer to the rib than not, except for the middles of the two, in which case I went for the centre. Each time I added more glue, I was sure to get it as close to the edge of the previous as possible, then squeegeed it into that small bit of remaining space by pressing on the leather.
One lesson learned from this process is to prevent any spillage over the long edges of the backboard onto the leather. Even the smallest bit of glue or errant particle will be surprisingly visible through the leather. If needed, take a sharp knife and cut/scrape out the spillover, but even then the results will be noticeably different than the areas where there was no glue spilling over. A wet cloth is the best way to clean the glue before it sets, wiping it away and then dry. This does not mean, however, that it is good to leave a gap in the glue around the edges. Right to the edge, but no farther.

Now that the backboard is in place, I put another piece of extra bookboard over the first to give it some rigidity. With how thick the book is, I did not want it to bend over time. A quarter inch or so narrower on each side than the original, I cut it to fit between the ribs (3/4" shorter on each end so it is not visible from the outside) and trimmed out the excess leather from the ribs so it sits flat on the other board.
To space the front and back covers, I used twice the thickness of the bookboard. This allows just enough room for the leather to move when the book is opened and closed without having the covers too loose.
Finally, the two covers are glued in place. Set on a flat surface to cure with weights evenly distributed on them (did each one separately), the cover is nearing completion. It is important that the surface the leather is pressed into is not textured, as it WILL, however fine, take on those markings.
Next will be finishing the pages for use in the cover, folding over the leather edges, and attaching it all together.